I am passionate about building and flying scratch built foam park jets and passing on my experiences and lessons learned from more than five years of experience. Blog is purely based on my own opinions and experiences. If you have questions, please e-mail me at scott.parkjet@gmail.com. Park Jet noise...the "other" sound of freedom :) Happy flying! Cheers, Scott
Showing posts with label RC Powers F-22 V5. Show all posts
Showing posts with label RC Powers F-22 V5. Show all posts
Had these two beauties at the field today having a bit of a "stealth" park jet fly off😎
Here is today's flight video.
The RC Powers F-22 V5 and the T-50 V5 (on the left) were released at the same time and I have been enjoying the F-22 for a long time as it is my favorite of all the RC Powers V5 park jets. I am a newcomer to the T-50 V5, but have been enjoying it immensely. Both planes are modified quite a bit, you can read more about my F-22 V5 build at this blog post, and the T-50 build by watching this table talk video. Also, through this blog starting in December 2017, you will find a multi part build log documenting everything I did with my T-50 build.
For today's flight, the power setups were exactly the same.
I guess one of the biggest parts of today's flyoff was to see which one is faster😊 In the promo for the T-50 V5, Dave Powers says "This one is even faster". I suppose I assumed that was meaning it was faster than the F-22 since they were released at the same time. Now perhaps it means it is faster than maybe the last version of the T-50, the V2 which was huge with a 39.5" wingspan?
Both these planes have the same wingspan, the T50 is actually almost 1 oz/28 gr lighter than the F22, but I don't know, after watching the video a couple times, it is a very close call which is faster😑 In my previous videos with the T50, I had said it was the fastest plane in my hangar at the time and it is certainly one of the quickest planes I have ever flow, but that was before I gave the F22 a 160 gr/5.6 oz thrust increase, so who knows?! Guess I'll be happy having two really fast stealth park jets in my hangar😀
They are both a lot of fun to fly and certainly fast. The F22 with more weight below the wing plate than the T50 is certainly more stable and a bit smoother to fly. Also, looking at the picture above, the F22 seems to have more wing area and coupled with the lift of the flat bottom shown below makes it feel like it has a much lower wing loading.
The T50 is noticeably more agile and responsive than the F22 even with smaller elevons and less control surface travel in the pitch and the roll. In fact it is almost borderline "twitchy" which isn't always a bad thing as it certainly allows me to fly it aggressively, however it is not as forgiving as the F22, so it really forces me to fly smoothly and stay ahead of the plane😳 While it will respond more quickly that the F22, the T50 is like flying very close to the razor's edge, push just a bit too far and it can become a bit of a handful. Whereas with the F22, I can push hard but because it is a bit more stable and forgiving, I have a second or two more to recover if I do something a bit beyond my skill level😵
These are both excellent planes, RC Powers did a great job on the designs. If I was to recommend a stealth park jet to try first, it would be the F-22 V5 hands down. RC Powers has been the leader in getting an F-22 park jet that flies will without being a complete handful to fly. The T50 would be good for a second stealth park jet once you feel you are ready to handle it's incredible responsiveness and want to really push the envelope😀
This article was originally written in Nov 2017 as you can see in the title. More recently, I shot this video discussing my current park jet build philosophies moving forward, however I thought I would keep the text from the original post as a record of how I arrived at my current mind set😊
After learning many lessons from my original all DTF build of this Mig-35B, I have recycled it for parts and have since built several more planes with DTF and a combination of other foams, primarily MPF (model plane foam) and Depron. I logged 115 flights on this plane before retiring it, it was a blast to fly and served me very well in learning how to build with DTF and inspire new ideas😊
Not including the black, grey and white Mig-35B in the video above, I built these four planes as I progressed in my DTF build journey.
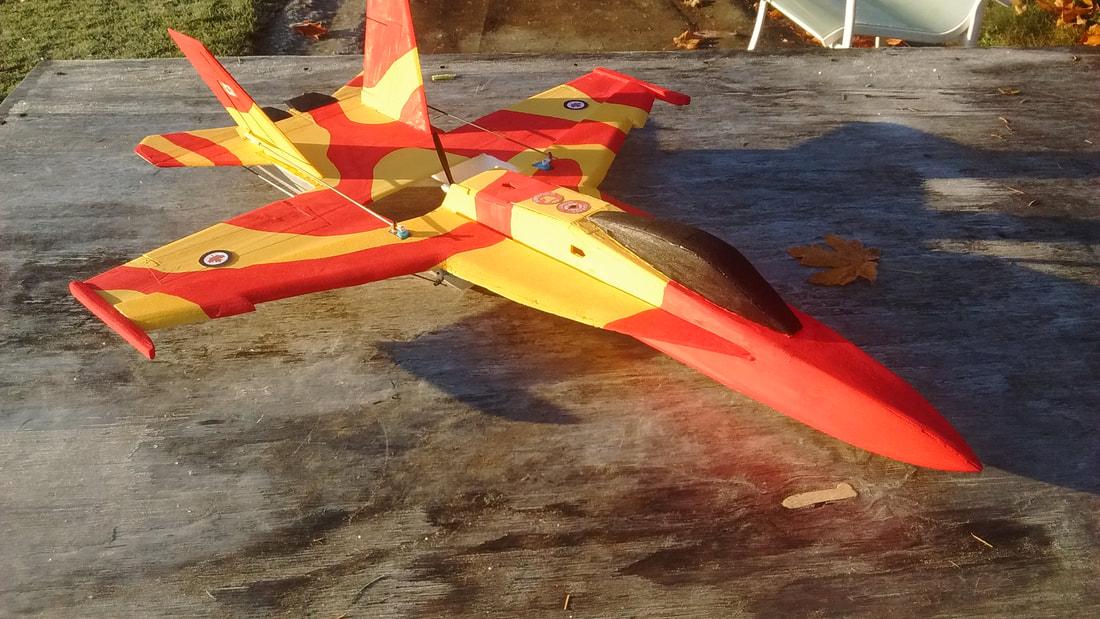
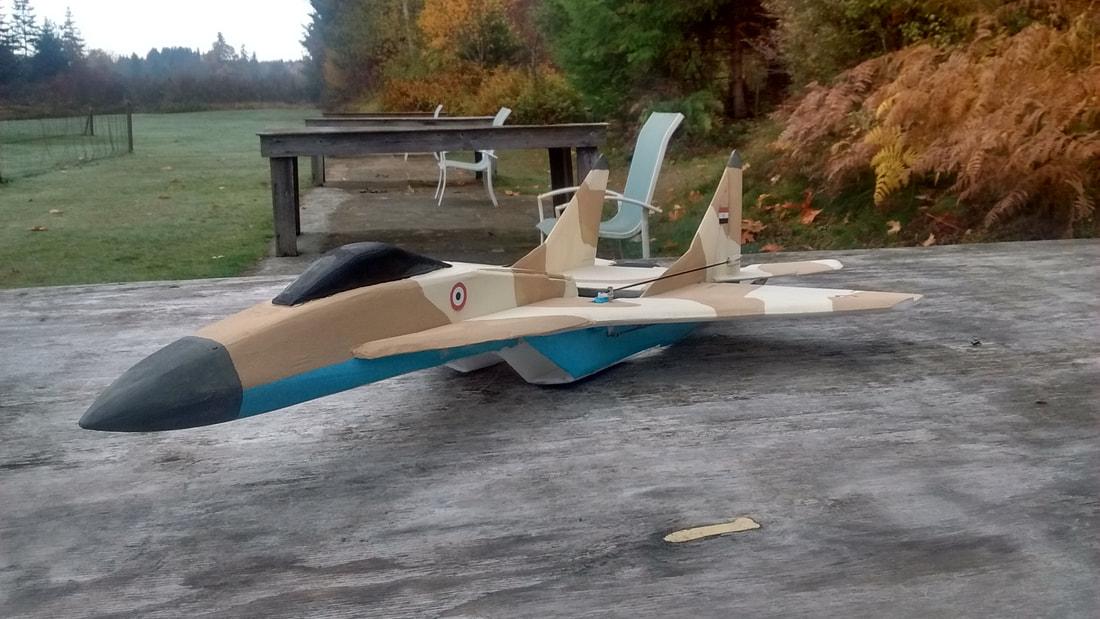
From top to bottom, RC Powers F-22 V5 built at 95% (27" wingspan), RC Powers F-18 V5, NAMC Mig-35Bbuilt at 90% (24" wingspan) and modified RC Powers Su-30 V4built at 85% (27.75" wingspan). These planes are listed in the order in which I built them and I will discuss each individually and the changes I made to each.
As a quick review, one of the issues I noted with the all DTF Mig-35B was that it was tail heavy because of all the paper left on the DTF behind the trailing edge of the KF airfoils. Also, I may not have written this in a previous article in this thread, but I did notice more longitudinal flex in the all DTF Mig-35B as the paperless DTF on the nacelles did not add a lot of extra stiffness to the plane in the longitudinal axis. Plus it did flex quite a bit and over time needed to be reinforced with tongue depressors and some extra glue. All which worked fine, but did add a little weight and drag to the plane. RCP F-22 V5 Besides other mods I made to this plane the first time I built it completely of MPF, I moved the motor forward by 1" to compensate for the extra weight of the paper on the DTF and also used some scrap Depron for the "engines/nacelles" and "under rudders".
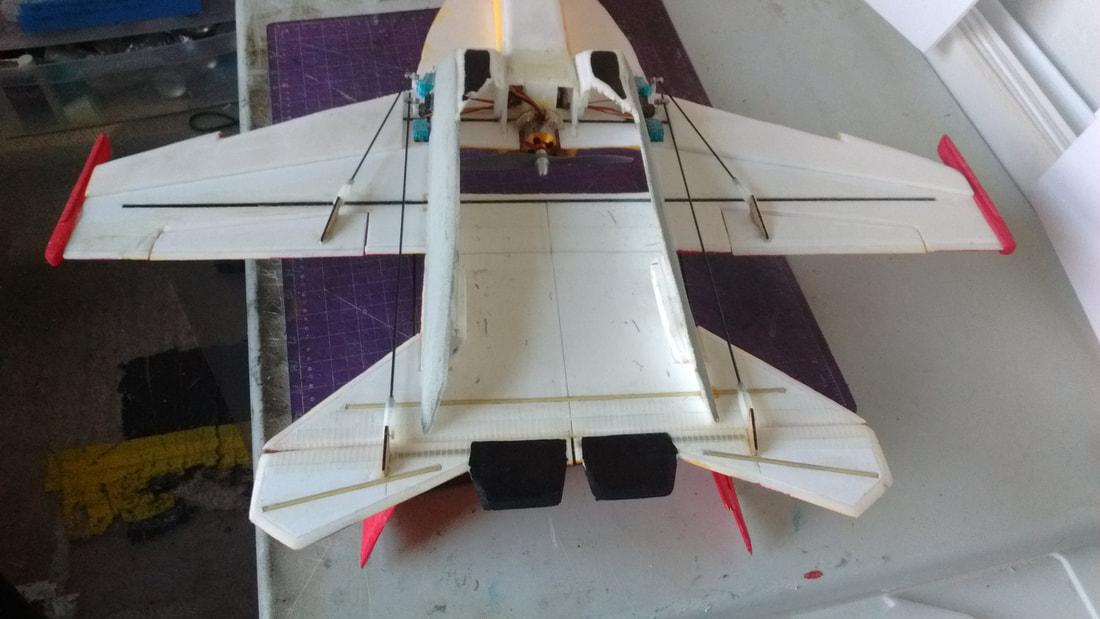
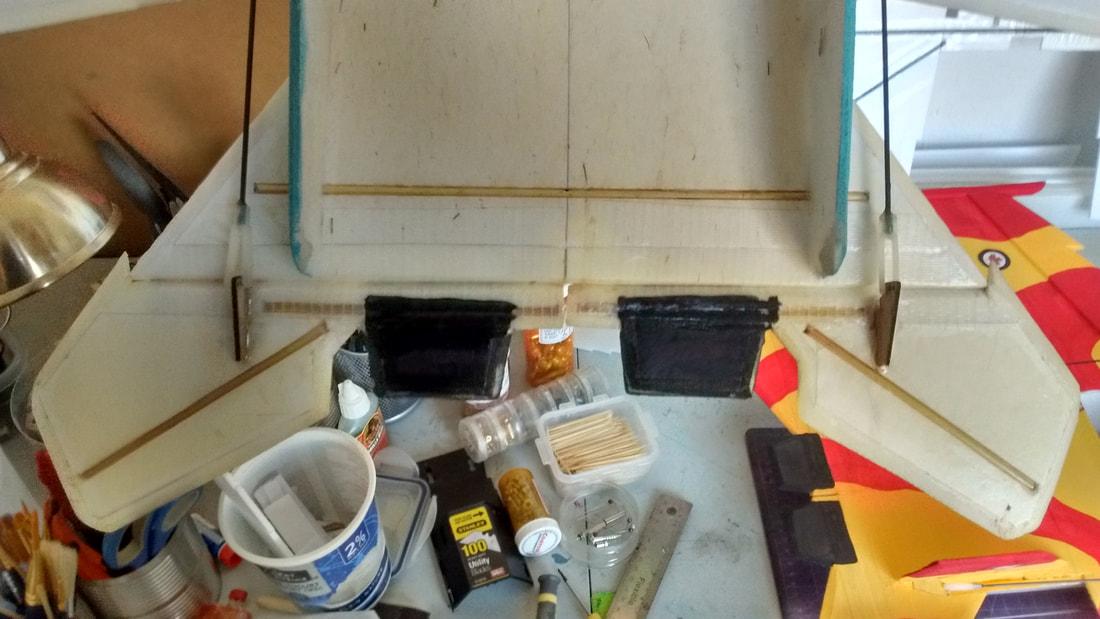
You can see in the picture above, there is still considerable reinforcement in the elevons and along the back plate. Small sections of bamboo don't weigh a whole lot, but adding the glue to secure them does make the weight add up. I had considered not putting the piece along the back plate ahead of the elevon hinge line, but felt I might still get too much flex as that area is not really "locked in" by any other parts of the plane. I also have reinforcement in the vertical stabs which are also made of DTF. Moving the motor forward did certainly compensate somewhat for the extra weight in the back of the plane, I also put my aileron and elevon servos further forward than I did in my first build, but I don't know that it tightened things up too much more around the CG, the PMI or distance between the front of my battery and the back of my motor is about the same as it was in my first F-22 V5 build which was built entirely of MPF. I did use 5 gram nylon gear servos for the rudders and ailerons which did help keep the plane lighter. Even with a full paint job (I didn't completely paint my first all MPF F-22, the total weight stayed pretty light at 20.8 oz/590 gr with a 2200 3S battery. The addition of the Depron for the nacelles and bottom plate made a significant difference, the plane feels much more solid and stiff than the all DTF Mig-35B did, so I imagine it should last even longer. At the time of writing this article, I have 101 flights on this plane and it is holding up extremely well and flies beautifully. Having reduced the frontal drag by using DTF over MPF has allowed me to fly this plane easily with a small quad racing motor which also helps to keep it light and very quick on the sticks. Moving the motor even further forward also makes the plane feel a bit more balanced and responsive in all three axes. Here is some flight video of it after I had it "dialed in" the way I like it. The F-22 V5 remains my favorite of all RC Powers V5 series.
RCP F-18 V5
This plane I built primarily of DTF and used some scrap MPF for the nacelles. In addition to the mods I made to my first F-18 V5 which again was built entirely of MPF, I made the following mods
I moved the motor forward by 1" to compensate for the weight of the paper left on the DTF behind the trailing edge of the KF airfoils and to see if I could improve high alpha performance;
I increased the size of the LERX again primarily to see if high alpha performance would be improved;
I added the "dogtooth" Super Hornet leading edge on the wing similar to the RCP F-18 V3 (mostly because I like that look better :)); and
I shortened the vertical stabilizers in height, but increased them in depth at the top.
To make the last three changes, I printed the parts of the F-18 V3 plans I needed at 91% so that they would be the same proportion as the V5. Unfortunately, none of these changes made any significant difference in the high alpha performance, but it did make the plane much smoother and even more balanced in the air, so I'll take that :) The MPF nacelles do help with longitudinal strength, however, I still ended up with a lot of reinforcement in the back end in the elevons, back plate and vertical stabilizers. Hopefully you can also see I put my servos as far forward as I possibly could to help compensate for the extra weight of the paper in the back end.
Overall, this plane feels as solid as the all MPF build, but is much smoother and quicker. I can sense the drag reduction by using DTF for the wings, fuselage, canopy, vertical stabs and elevons, but still not as light as it could be. It weighs about the same as my all MPF build, with a significant reduction in drag and is stronger and stiffer than the all DTF Mig-35B I built. Here is some video of it with a pretty peppy motor setup 😊
NAMC Mig-35B built at 90%
I built this plane at the smaller size primarily because I had been playing around with an updated RC Powers T50 V1 (that didn't go terribly well, perhaps I'll write about that another time :)) and I saw that with a small quad racing motor, the T50 really moved along as it is small with a 24" wingspan. I have become quite interested in testing some of the powerful quad racing motors as they are much lighter than most of what I currently use in my planes and very powerful for their size. So taking what I learned from the F-22 and F-18, I built this primarily of DTF with the nacelles and vertical stabilizers made of MPF. I moved the motor forward by 1" to compensate for the weight which seemed to work out quite well, of course with a 24" wingspan it is quite smaller than the full size, so things still stay pretty tight around the CG anyway. However, I still ended up with reinforcement in the back plate, elevons and the vertical stabilizers. I still put some reinforcement across the back plate, but I think I could have done without it in this plane as it is locked in pretty solid with the MPF nacelles and vertical stabs.
This plane is very stiff and strong and is an absolute rocket with a peppy quad racing motor setup :) In this video, I do some gabbing about the prop and motor at the start, the flying starts at about 1:45.
85% RC Powers Su-30 V4 I built this as a bit of a "beater" plane for the winter and to experiment with a slightly smaller wingspan to evaluate different quad racing motors I have ordered for testing over the coming weeks and months.
This plane has the fuselage, wing plate and back plate made with DTF, the nacelles and vertical stabilizers made of MPF and the elevons made with Depron. In the previous builds where I have used DTF for the elevons, I have ended up with a couple of pieces of reinforcement in each elevon which of course adds weight. I found enough scrap Depron to make the elevons which at this size require no extra reinforcement to still have a stiff control surface. I still have reinforcement in the back plate and the vertical stabs, but reducing the weight in the elevons did help with reducing the tail heaviness I still saw in a couple of the other planes based on where I needed to place my battery forward to get them to balance. I didn't move the motor any further forward on this plane as it is already pretty far forward. So this plane flies really well, is very strong and thus far durable. Since most of the thinner DTF is in the fuselage and wing, I don't sense that the thicker vertical stabs, intakes and elevons create too much drag. Here is some video of it flying with the same power setup I used in the F-22 V5.
So taking lessons learned from all these builds, I got thinking about what I could do next to build a plane that was light, strong and combined the stiffness of Depron and the lower drag profile of DTF. I should say I am kind of "hording" my remaining six sheets of hobby grade Depron, so I was a bit hesitant to use it at first, but I'm very eager to see if this takes building with DTF in combination with another foam to the next level :)
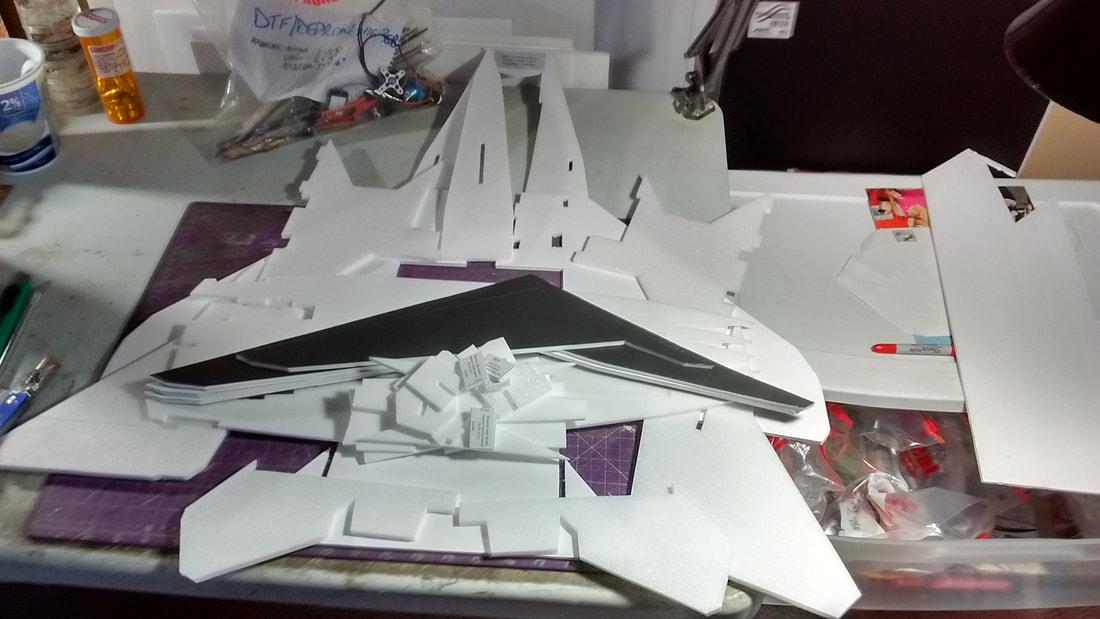
I have already started another Mig-35B, this time built again at 100%, here are all the parts cut out. This took two sheets of 20x30" DTF and half a sheet of 27"x39" Depron.
So in this build, the wing plate, fuselage, canopy, back plate and of course KF4 airfoils will be made of DTF, the nacelles, vertical stabilizers and elevons will be made of Depron. I have moved the motor forward by 1" to compensate for the weight of the paper on the DTF behind the leading edge of the KF. I won't put any reinforcement in the back plate, I think once the plane is together and the back plate is locked in by the Depron vertical stabs and nacelles, it should be pretty solid. Since I don't need any reinforcement in the Depron elevons and vertical stabs, I will also save that weight over the other builds. I'm excited to see how it makes out, I currently have a 100% Mig-35B in my hangar built with Depron and MPF and it moves along quite well with a peppy little quad racing motor, so I am interested to see if I end up lighter and faster (less drag) with this current built. Here is some video of the Depron/MPF Mig-35B.
So lots of lessons learned again building with DTF and other foams. I think since I have them, making the right choices for weight and strength I can save a lot of money building with more DTF, it is readily available to me and I should be able to stretch my supply of Depron and MPF even further 😊 More testing and evaluation to come in the near future 😊
Since originally posting this in the old NAMC blog, I have finished my Depron and DTF Mig-35B and have over 100 flights on it using it as a test bed for several different quad racing motors. Here is some flight video of it with my favorite quad racing motor setup thus far😉
I also recently shot this "Table Talk" video summarizing some of my lessons learned and how I have changed my build philosophy of my park jets with respect to foam, motor and servo choices.
Park Jet noise...the "other" sound of freedom😎 Cheers, Scott
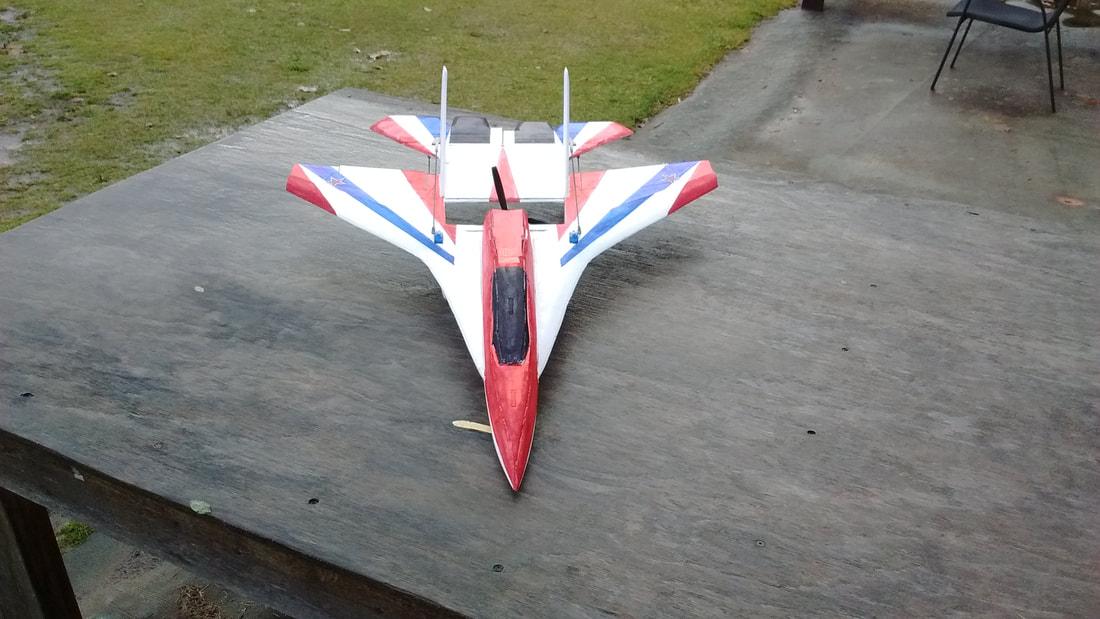
I had this little beauty out for a good thrash, reaching the 100 flight milestone on this plane😊 Between the two RC Powers F-22 V5s I have built, I now have 300+ flights, it is my favorite of the RC Powers V5 series of park jets.
This is the second F-22 V5 I have built, the first one was built of MPF, this one is build mostly of Dollar Tree foam (DTF or Adams Readi-board) and some Depron, I'll cover more details in a bit. Here is some video of my first build with a discussion of the mods I made. You can also read further details on the NAMC blog, hence why I called this blog post "take 2"😊
Here is some flight video of my current plane shot just awhile ago with the current setup I am still using.
Here is a "table talk" video I did that discusses much of what is below, however as mentioned in the video, you will find more pictures and actual measurements below if you are looking for ideas or inspiration to try your own mods😊
So learning from the first build and some of the DTF builds I have done recently, when I decided to build another, I chose to build the wing plate, fuselage and vertical stabs of DTF. The "engine/nacelles" on the bottom are made of 6 mm Depron (the parts with the black lines and light blue paint in the picture below) The "under rudders" are also made of Depron.
I again downsized the plans by 5%, so my wingspan is now 27"/686 mm and my plane is 36 and 1/4"/921 mm long. I like this size as it fits in well with most of the other planes I have in my "hangar".
My current AUW with a 2200 3S battery is 20.9 oz/592 gr.
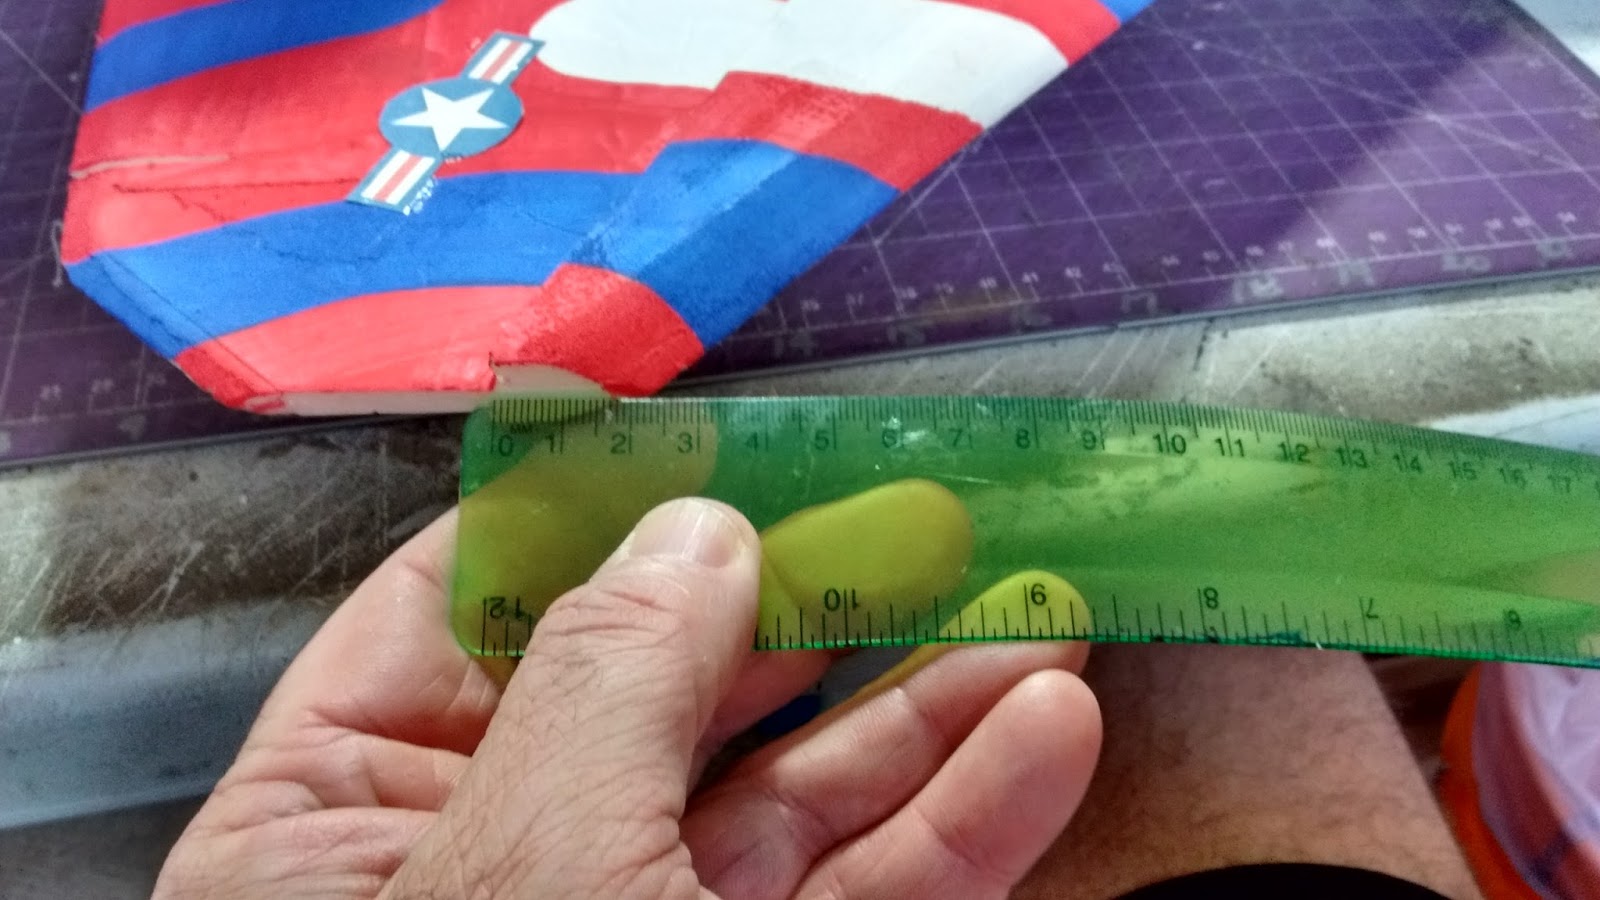
My current throws are as follows, I should mention that I fly with fairly low expo, 15% in the pitch and roll and 20% in the yaw, setting them at "just enough" to allow me to fly how I like to fly with a little extra in the pitch if I need to avoid contact with the ground, tree, fence, me😉 -
Pitch - 3/4" one way;
Roll - Elevon - 5/8" one way, Aileron 1/2" one way; and
Yaw - 1 and 1/2" one way.
Here is a series of pictures showing where I held the ruler to make these measurements for reference.
Build modifications
I will start at the nose of the plane and work backwards.
As I did with the first F-22 V5 I built, I made several mods not including downsizing it by 5%. Some of the same mods followed into this build with one or two more.
KF airfoils. I resized the KF4 airfoils somewhat, mine are about 40% of wing chord at the wing root measured where the wing meets the fuselage and about 35% of wing chord at the tip. From all the testing done with the NAMC Mig-FA and Mig-35A, this is my favorite setup for the majority of park jets I fly. I did have to do some careful checking since I was moving the motor forward by 1" and adjusting the leading edge of the prop slot to accommodate shorter quad racing motors as you can see in this picture, not a whole lot of room there😊
The measurement of my top KF airfoil along the fuselage where the ruler is showing below is 10 and 5/16"/262 mm.
At the wingtip, the KF measures 7/8"/23 mm.
On the bottom KF, along the side of the "engines", it measures 4 and 7/8"/120.6 mm, same measurement at the wing tip as the top KF.
Ailerons. As mentioned in the video above, I resized my ailerons to suit how I like my planes to handle. I have found that ailerons that span 60% of the trailing edge of the wing gives me the "feel" that I like in my park jets. I put the inside of the aileron where the red line is shown where it was on the plans and lengthened it to 1 and 3/4"/44.5mm. Where the white line is along the trailing edge of the aileron, it measures 5 and 7/8"/149mm (I think I said the wrong number of mm in the video, sorry😞. Where the black line is on the outer edge of the aileron, it measures 1 and 1/8"/28.5 mm
As mentioned in the video, I lowered the battery down as low as I could get it while still keeping good strength in the bottom of the fuselage. Where my battery attaches to the plane is now 1 and 1/4"/31.75 mm below the bottom of the wing plate. I think this is crucial to making this plane as stable as possible without causing any handling issues. It definitely makes it far more stable and "self righting" if I get too slow or get myself into trouble.
The motor is moved forward by 1" and I trimmed about 3/8"/9.5mm off the leading edge of the prop slot after moving the motor forward. This is to help accommodate shorter quad racing motors. This ensures proper clearance between the leading edge of the prop slot and the prop, improving performance and reducing noise.
As mentioned in the video, I "shimmed" the motor so that it angles down to help prevent "zooming" as the plane accelerates to top speed. Hopefully you can see the washer where the tip of the hex driver is pointing. This washer is about 1mm thick. I would still always mount the motor and motor mount square and straight first, then shim as you need to so that you don't have to purposefully fly nose heavy or carry around a bunch of down trim. I just like my planes to stay level and blast ahead full speed when I hammer the throttle and not climb or dive as they accelerate😎
As mentioned in the video, I trimmed about 1/2" off the top of the vertical stabilizers to help reduce drag a bit and improve roll performance. I might experiment with downsizing them even more in a future build, I'm not sure.
As mentioned in the video, current CG location as balanced now is about 1/2" ahead of the stock location or the center of the "CG spectrum" that RC Powers puts on their plans these days. Here is a picture of the "CG spectrum" for reference, I think this was from my first F-22 V5.
On all my V5s from RC Powers, I start off with my CG marked dead center of the solid black rectangle, so looking back at this picture, the CG moved forward considerably on both my F-22s. Here is where the CG is located on the current Raptor. The toothpick indicates where the starting point was, the "T" pin indicates where my plane balances best.
I can't think of much else to share with you at this point that hasn't been either covered in the video or in this blog post.
I am certainly very pleased with the DTF and Depron build, both foams working and holding up very well. This version certainly is "slipperier" than my first one built out of 6mm MPF (Model Plane Foam), so it flies really well even with smaller quad style racing motors with the reduced drag. It is holding up much better than the original all DTF Mig-35B I built and is strong and stiff, so as I learned from previous builds and carried over to builds after this one, combining DTF with other foams for strength and drag reduction is definitely the way ahead for me😊
The F-22 V5 is my favorite of the V5 series as it is such a great all round flier and that F-22 plan form looks pretty cool in the sky😎
If you have any other questions about my build or setup, please leave them below, or if you want other pictures I might have of my build as it went along, please feel free to e-mail me at scott.parkjet@gmail.com.
I was watching a YouTube video this morning while enjoying my coffee from a fellow whose channel is called Ground Control RC, I encourage you to check out his channel here. He does great work with micro RC planes and quads and has designed his own micro F-22 Raptor which I think I might need to give a go with in the future😊 Also, he has some great RC tips in general that are educational across the electric RC hobby, so please consider having a look around his channel, he puts a lot of work and passion into what he does and creates some great content. Here is the video I watched this morning.
So this video and my second cup of "jet fuel" got me thinking that I certainly have been complacent in doing pre and post flight checks of my planes and my flight box in recent months. Once I'm at the field I certainly look my planes over between flights, but more than once I have taken a plane to the field that wasn't quite ready to fly, perhaps I couldn't repair it there and I have had to cut a flying session short. Or I have used something in my flight box and forgotten to replace it and couldn't do field repairs and again had a "drive of shame" back home cutting my flight session short. So time to stop relying on luck and taking the time to give things a once over before and after going to the field.
I know some of this might set off some "nerd alerts", but as you might know if you read my intro post, I spent a lot of my life in the Air Force where we had checklists for just about every thing. Of course we were dealing with very complex and expensive equipment and people's lives were at stake, but having a process for my park jet flying is also helpful to avoid being disappointed and not get to do what I love and that is fly.
Weather and what planes to bring
Of course we always take a bit of a chance with the weather forecast, just a part of life in the aviation world either real or RC, but I like to have a pretty good idea of what the weather is going to do for the duration of my flight session as it helps me select the right planes. In my "hangar" I have planes that are pretty stable in the wind and others not so much.
Of the two planes above, the NAMC Mig-35B on the left is definitely a very stable plane in winds up to about 15 mph. The RC Powers F-22 V5 on the right is OK up to winds between 5-10 mph, beyond that and it can be a bit of a handful. One of the main reasons for this is angle of the tail fins. You note on the Mig-35B they are perpendicular to the wing plate, on the F-22 they are angled which with the Raptor causes quite a bit of "bobble" and instability in the yaw axis if the wind gets up a bit.
So if I know it is going to be a windier day, taking at least one good "wind plane" is always a good idea. If it is going to be dead calm, I have a lot more options and can take just about any plane in my hangar and I'll have fun.
I should also mention, I almost always take two planes to the field for every flying session. This serves a couple purposes as it helps me from getting bored or if I crash one or something happens that makes it unsuitable to fly, I have a backup and can keep going til my batteries are all used up.
So once I make the choice of which planes are in the lineup for that day, here are some things I like to check and will be checking more often now that I have been reminded how important it is to do so. These are all areas where I have been "caught" in the past, so time to get more diligent with the pre flight checks before loading up the car.
General inspection of the airframe. Checking the integrity of glue joints and the airframe itself, any cracks, weak points, wing OK? etc;
Control surfaces and hinges. Are the hinges all good? Nothing coming loose? No cracks in the surfaces where they might fail?;
Linkages. Are the servos secure? Are the pushrods intact and secure at the servo and the control horn? Are the control horns secure, no issues with the glue joint there?
Motor, prop and motor mount. Is the motor spinning smoothly, no debris inside? Is the prop in good shape, no major knicks or imbalance issues? Sometimes the aluminum shaft on the prop collet as shown below where the screwdriver is pointing can be bent causing the prop to not run true and should be replaced. Is the motor secure on the wooden mount and is the wooden mount secure on the plane? Also, is the foam around where the motor is mounted in good shape? Sometimes cracks can form in the wing plate close to the motor mount from stress, prop strike or a hard landing. Hopefully you get the idea of what I mean in the second picture, this glue was added as a preventative measure, but strengthens the area I see cracked most often on my planes. I used expanding Gorilla Glue for this which is why it looks like "the blob" slimed my plane😄
Electronics bay. Is the antenna still securely connected to the receiver if it has one? Are all the servo and ESC leads secure in the receiver? Are the three wires connecting the motor and the ESC still connected and in good shape? The main point of failure I have experience regarding the ESC is the two leads and connector that go to the battery. These get a lot of tugging, bending and general "abuse" connecting and disconnecting the battery, so sometimes solder joints can break or the leads can come loose where they go into the ESC.
Batteries. Are the batteries charged? Are they physically in good shape, no major dents or dings? Is the velcro secure where they will be attached to the plane? Are the connectors and battery leads in good shape and secure?
Flight box
I shot this video last year which goes over in detail what I carry in my flight box for a flying session. I know it seems like a lot of stuff, but everything I have in that box is because I have needed to use it to keep a flying session going. I won't go over every single thing before each trip to the field, but will try to remember if I used anything the last time out that needs to be replaced.
Part of my flight box check also includes my transmitter. I have an older Turnigy 9X upgraded with the Smartie Parts circuit board and flashed with er9x firmware. It is probably the last transmitter I will ever need or buy as it does everything I need it to do and then some and it is simple and robust.
I check to make sure the battery has sufficient juice to last the flight session, the antenna and all the switches, sticks and everything else are in good shape.
Of course I also shoot a lot of flight video, so I also ensure that my head cam is charged and that I have removed any old files from the SD card so that it won't fill up or cause me issues. I have been using this Contour Roam for about 5 yrs now.
Post flight
I essentially repeat my pre flight on my planes to again ensure they are ready to go the next time I want to take them flying or if a little "maintenance" is required before they action again. One thing I always check is this area just ahead of the electronics bay door where my finger is pointing. Occasionally when I'm getting my battery in and out, my big sausage fingers might break this seam. The plane will still fly with this cracked, but I don't want the crack to go any further and cause the nose/fuselage to start to come apart.
If I remember, I will resupply anything I might have used from my flight box and if need be, charge the battery in my transmitter. I use an 1800 3S LiFe pack in my transmitter, so it lasts quite awhile, but especially when the weather is cold it does need to be checked and charged more often.
So I know this seems like a really comprehensive list and you are thinking, goodness, that would take forever, I just want to go flying! Well, once you have a good routine, it does not take very long, it took me much, much longer to write this than it does to get ready to go to the field. But the few extra minutes makes all the difference in getting me flying right away and keeping me flying as long as I want to. As I often need to remind myself, "I don't plan to fail, I just sometimes fail to plan!😒"