Showing posts with label NAMC Mig-35B. Show all posts

Monday, January 22, 2018

Which Park Jet for me? - Part 5 - Size and weight

Hi Everyone -

For the most part, these two characteristics of size and weight are closely combined, the bigger the plane, normally the heavier.  Additionally, the bigger the size and wingspan, the more drag which definitely takes away from a park jet's performance.

As mentioned, I am basing my thoughts and opinions on using the most popular park jet power setup, the 2212/6 2200 Kv motor with a 6x4E APC prop using a 3S battery.  As a baseline, in numerous tests, I have found motors in this size range to produce anywhere from 25 oz/709 gr to 30 oz/850 gr of thrust depending on the motor.  Quality control and consistency is not always the best, but most are around the 27-28 oz (765-794 gr) range thrust wise.  So to maximize the amount of power you have available, it is very important to consider size and weight when selecting a park jet in my experience.  Too much drag and/or too much weight are two of the biggest detractors to good park jet performance.

First, I will discuss size.  I have found through experience that about a 27"/685 mm wingspan is the ideal "sweet spot" for a park jet.  It gives the plane good presence in the air without having too much frontal drag and just seems to work really, really well.  With good build techniques, for most planes of this size, it is still relatively easy to keep them light so even with the 2212/6 2200 Kv motor setup, you can still have decent speed and plenty of acceleration and power for aerobatics.  I use this 27" wingspan as the baseline to determine other scale dimensions like elevon span, etc.

Whenever possible, if the plane is too much bigger than 27", I will downsize the plans when I print them off to keep this size and performance that I seek. This is not always possible without a certain amount of modification, it is important to pay attention to what size the prop slot is on the full size plane. If it is already very tight with a 6" prop, downsizing could cause significant issues with prop clearance.

Another thing I like to do is determine the ratio between the length and the wingspan to see how close it is to being a scale representation of the real airplane.  Not only does this confirm to me that it is a close scale size of the real plane, but lets me know if it isn't, what sort of behaviors I might expect.  So first I go to Wikipedia to find the length and wingspan of the real plane to calculate a ratio.  

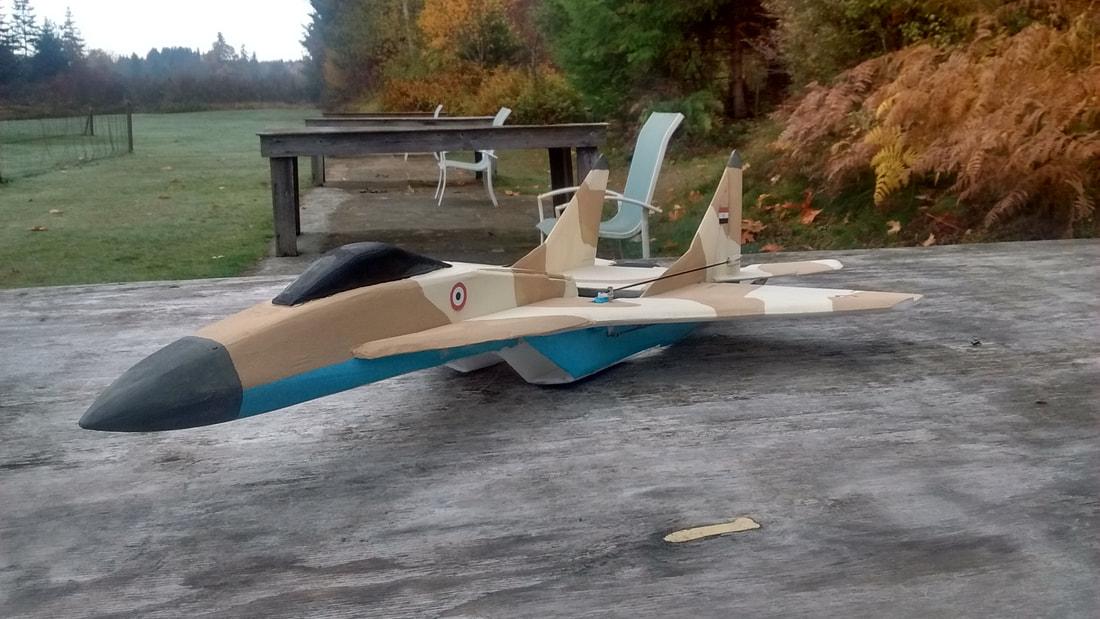
I will use the NAMC Mig-35B as an example.  Looking at Wikipedia, we find the length of the real Mig-35 to be 17.3 meters divided by the wingspan of 12 meters (I find using the metric dimensions easier to calculate a ratio rather than feet and inches) gives a ratio of 1.44:1.  So multiplying 1.44 times 27" which is the wingspan of the model, to be scale, the model should be 38.9" long.  It is in fact 38.5" long, so very close to scale.  I have found that for best scale looks and overall performance, being within about an inch of true scale dimension to be very acceptable.  Of course there are always exceptions to the rule, but having the length and wingspan ratio close to scale dimensions normally helps keep everything in good proportion and provides overall best flying characteristics.

Why is this important?  Well, the F-18 V3 which I already recommended as a good starting score and fold park jet is about 2.5" too long when compared to the scale dimensions of the F-18 E/F Super Hornet on which it is loosely based.  This means the overall length/lever of the plane is a bit out of proportion, which slows it's performance in the pitch down somewhat.  However, again this is not a bad thing in my opinion for a starter park jet as it slows things down allowing a newer pilot a better chance to keep up with or stay ahead of the airplane.

So not all the dimensions of a plane will be, need to be or should be scale, sometimes to make the plane fly better, designers need to take some licence with the scale dimensions.  For example, when Stephan (NAMC chief designer) updated the Mig-35A to the Mig-35B, one of the biggest improvements was increasing the wing area by about 10%, helping to really open up the slow speed handling of this plane.  So as always, there will be aerodynamic and scale compromises, but if one or more things gets too far out of whack, it will impact how the plane flies, so it needs to be considered when trying to determine which park jet is right for your or how you might modify it to suit your flying needs and style.

Weight is also very important to consider when looking at a park jet's design.  Early in my park jet career, I was a card carrying member of "overbuilder's anonymous".  I was stuck in a mind set that when in doubt, add more glue or more tape, it will make the plane stronger and more survivable.  I could not have been more wrong.  I look back now and shake my head to think I actually had built planes that weighed over 2 lbs!  No wonder they never flew well 😲

It is simple science really, the heavier the plane, the higher the wing loading, the faster you need to fly it, the less responsive it is...I guess you know where this is going 😱  Heavy plane, not too responsive, too much speed, crash is not going to be pretty even with all the extra glue, tape, etc.  As I mentioned in the intro, most of my early crashes were spectacular if nothing else, but rarely repairable.  When you have too much mass and kinetic energy coming to a sudden halt in a tree or on the ground, the foam cannot withstand the punishment.  As soon as I got out of this mindset and starting building my planes lighter, I turned a huge corner in my park jet career.  First, my number of mishaps was reduced immediately as my planes were easier to fly, didn't have to be flown as fast and were far more responsive when I did get myself into trouble.  And when I did have a mishap, which I still do on occasion, just part of the hobby, they are far less damaging to the plane and normally easily repairable.

Although sometimes very tough to tell until you actually look at a set of the plans, doing some reading and research can help you answer a couple of important questions.
  • Are there a lot of parts?  Some designers have a lot of parts for scale looks or increased strength and structure.  I know it seems a bit hard to believe that a few extra pieces of foam would contribute to a plane being heavy, but grams add up to ounces and so on.  Starting off with a lot of foam in the build normally means a lot more glue to bond all these parts together and means you might have to make some sacrifices in equipment (servos for example) or paint you can add later in the build to remain at a decent flying weight;
  • Does the design call for lots of reinforcement?  Some designs by their nature require extra reinforcement in the form of carbon fibre, bamboo BBQ skewers, etc.  Also, some designers recommend all kinds of reinforcement, so it important to take this into account, perhaps you don't need it all and it might be prudent to ask the designer what their experience has been to recommend all the extra reinforcement.  
Size and weight are going to become even more important for many of us going forward as the supply of hobby grade Depron "dries up" and we need to build our planes from softer, more flexible foams in the future.  I have several planes from MPF (model plane foam) and one plane entirely of DTF (Dollar Tree foam or Adams readi-board) on average have needed to add about a half oz/15 gr in extra reinforcement to get the strength and rigidity I seek in my park jets.  After several builds experimenting with different foams, motors and servos, this video describes my current park jet building philosophy to keep things light and strong.
So hopefully this article will have given you some food for thought about how important the starting size and weight of a plane is from the beginning of the build.  It is always much easier to add a little weight later to get good balance or help with wind penetration and stability, but if the plane starts off too big or too heavy for your power system right from the start, it is much harder to lighten the plane later without sacrificing performance or what you want out of your plane.  

In the next article, I will discuss wing size and shape and how the properties of each wing affect the plane's performance.


Park Jet noise...the "other" sound of freedom😎
Cheers,

​Scott

Friday, January 19, 2018

Building with DTF - Part 6 - 26 Nov 2017 update and the way ahead

Hi Everyone -

This article was originally written in Nov 2017 as you can see in the title. More recently, I shot this video discussing my current park jet build philosophies moving forward, however I thought I would keep the text from the original post as a record of how I arrived at my current mind set😊
After learning many lessons from my original all DTF build of this Mig-35B, I have recycled it for parts and have since built several more planes with DTF and a combination of other foams, primarily MPF (model plane foam) and Depron.​ I logged 115 flights on this plane before retiring it, it was a blast to fly and served me very well in learning how to build with DTF and inspire new ideas😊
Picture
Not including the black, grey and white Mig-35B in the video above, I built these four planes as I progressed in my DTF build journey.

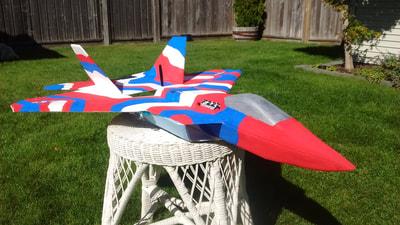
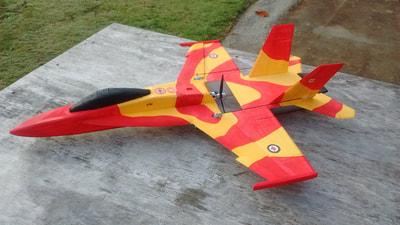
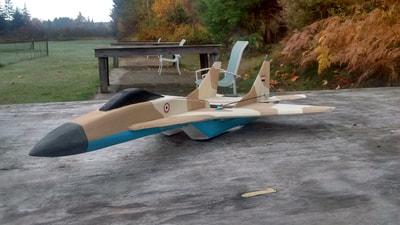
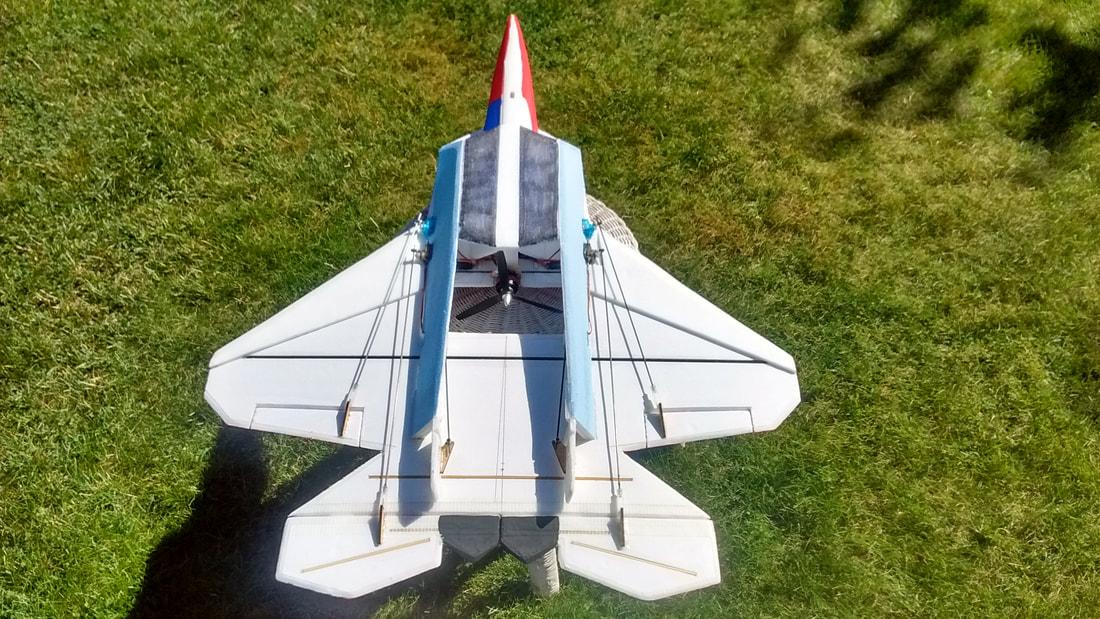
From top to bottom, RC Powers F-22 V5 built at 95% (27" wingspan), RC Powers F-18 V5NAMC Mig-35B built at 90% (24" wingspan) and modified RC Powers Su-30 V4 built at 85% (27.75" wingspan).  These planes are listed in the order in which I built them and I will discuss each individually and the changes I made to each.
http://www.migsrus.com/uploads/4/7/4/9/47499877/2017-09-20-14-24-59.jpg
http://www.migsrus.com/uploads/4/7/4/9/47499877/2017-10-31-09-47-46.jpg
http://www.migsrus.com/uploads/4/7/4/9/47499877/2017-10-26-09-15-10.jpg
http://www.migsrus.com/uploads/4/7/4/9/47499877/2017-11-16-09-38-36.jpg
As a quick review, one of the issues I noted with the all DTF Mig-35B was that it was tail heavy because of all the paper left on the DTF behind the trailing edge of the KF airfoils.  Also, I may not have written this in a previous article in this thread, but I did notice more longitudinal flex in the all DTF Mig-35B as the paperless DTF on the nacelles did not add a lot of extra stiffness to the plane in the longitudinal axis.  Plus it did flex quite a bit and over time needed to be reinforced with tongue depressors and some extra glue.  All which worked fine, but did add a little weight and drag to the plane.

RCP F-22 V5

Besides other mods I made to this plane the first time I built it completely of MPF, I moved the motor forward by 1" to compensate for the extra weight of the paper on the DTF and also used some scrap Depron for the "engines/nacelles" and "under rudders".
Picture
You can see in the picture above, there is still considerable reinforcement in the elevons and along the back plate.  Small sections of bamboo don't weigh a whole lot, but adding the glue to secure them does make the weight add up.  I had considered not putting the piece along the back plate ahead of the elevon hinge line, but felt I might still get too much flex as that area is not really "locked in" by any other parts of the plane.  I also have reinforcement in the vertical stabs which are also made of DTF.

Moving the motor forward did certainly compensate somewhat for the extra weight in the back of the plane, I also put my aileron and elevon servos further forward than I did in my first build, but I don't know that it tightened things up too much more around the CG, the PMI or distance between the front of my battery and the back of my motor is about the same as it was in my first F-22 V5 build which was built entirely of MPF.  I did use 5 gram nylon gear servos for the rudders and ailerons which did help keep the plane lighter.  Even with a full paint job (I didn't completely paint my first all MPF F-22, the total weight stayed pretty light at 20.8 oz/590 gr with a 2200 3S battery.

The addition of the Depron for the nacelles and bottom plate made a significant difference, the plane feels much more solid and stiff than the all DTF Mig-35B did, so I imagine it should last even longer.  At the time of writing this article, I have 101 flights on this plane and it is holding up extremely well and flies beautifully.  Having reduced the frontal drag by using DTF over MPF has allowed me to fly this plane easily with a small quad racing motor which also helps to keep it light and very quick on the sticks.  Moving the motor even further forward also makes the plane feel a bit more balanced and responsive in all three axes.​  Here is some flight video of it after I had it "dialed in" the way I like it.  The F-22 V5 remains my favorite of all RC Powers V5 series.

RCP F-18 V5
Picture
This plane I built primarily of DTF and used some scrap MPF for the nacelles.  In addition to the mods I made to my first F-18 V5 which again was built entirely of MPF, I made the following mods
  • I moved the motor forward by 1" to compensate for the weight of the paper left on the DTF behind the trailing edge of the KF airfoils and to see if I could improve high alpha performance;
  • I increased the size of the LERX again primarily to see if high alpha performance would be improved;
  • I added the "dogtooth" Super Hornet leading edge on the wing similar to the RCP F-18 V3 (mostly because I like that look better :)); and
  • I shortened the vertical stabilizers in height, but increased them in depth at the top.
To make the last three changes, I printed the parts of the F-18 V3 plans I needed at 91% so that they would be the same proportion as the V5.  Unfortunately, none of these changes made any significant difference in the high alpha performance, but it did make the plane much smoother and even more balanced in the air, so I'll take that :)

The MPF nacelles do help with longitudinal strength, however, I still ended up with a lot of reinforcement in the back end in the elevons, back plate and vertical stabilizers.  Hopefully you can also see I put my servos as far forward as I possibly could to help compensate for the extra weight of the paper in the back end.
Picture
Overall, this plane feels as solid as the all MPF build, but is much smoother and quicker.  I can sense the drag reduction by using DTF for the wings, fuselage, canopy, vertical stabs and elevons, but still not as light as it could be.  It weighs about the same as my all MPF build, with a significant reduction in drag and is stronger and stiffer than the all DTF Mig-35B I built.  Here is some video of it with a pretty peppy motor setup 😊

NAMC Mig-35B built at 90%
Picture
I built this plane at the smaller size primarily because I had been playing around with an updated RC Powers T50 V1 (that didn't go terribly well, perhaps I'll write about that another time :)) and I saw that with a small quad racing motor, the T50 really moved along as it is small with a 24" wingspan.  I have become quite interested in testing some of the powerful quad racing motors as they are much lighter than most of what I currently use in my planes and very powerful for their size.  

So taking what I learned from the F-22 and F-18, I built this primarily of DTF with the nacelles and vertical stabilizers made of MPF.  I moved the motor forward by 1" to compensate for the weight which seemed to work out quite well, of course with a 24" wingspan it is quite smaller than the full size, so things still stay pretty tight around the CG anyway.  However, I still ended up with reinforcement in the back plate, elevons and the vertical stabilizers.  I still put some reinforcement across the back plate, but I think I could have done without it in this plane as it is locked in pretty solid with the MPF nacelles and vertical stabs.
Picture
This plane is very stiff and strong and is an absolute rocket with a peppy quad racing motor setup :)  In this video, I do some gabbing about the prop and motor at the start, the flying starts at about 1:45.
85% RC Powers Su-30 V4

I built this as a bit of a "beater" plane for the winter and to experiment with a slightly smaller wingspan to evaluate different quad racing motors I have ordered for testing over the coming weeks and months.
Picture
This plane has the fuselage, wing plate and back plate made with DTF, the nacelles and vertical stabilizers made of MPF and the elevons made with Depron.  In the previous builds where I have used DTF for the elevons, I have ended up with a couple of pieces of reinforcement in each elevon which of course adds weight.  I found enough scrap Depron to make the elevons which at this size require no extra reinforcement to still have a stiff control surface.  I still have reinforcement in the back plate and the vertical stabs, but reducing the weight in the elevons did help with reducing the tail heaviness I still saw in a couple of the other planes based on where I needed to place my battery forward to get them to balance.  

I didn't move the motor any further forward on this plane as it is already pretty far forward.  So this plane flies really well, is very strong and thus far durable.  Since most of the thinner DTF is in the fuselage and wing, I don't sense that the thicker vertical stabs, intakes and elevons create too much drag.

Here is some video of it flying with the same power setup I used in the F-22 V5.
So taking lessons learned from all these builds, I got thinking about what I could do next to build a plane that was light, strong and combined the stiffness of Depron and the lower drag profile of DTF.  I should say I am kind of "hording" my remaining six sheets of hobby grade Depron, so I was a bit hesitant to use it at first, but I'm very eager to see if this takes building with DTF in combination with another foam to the next level :)

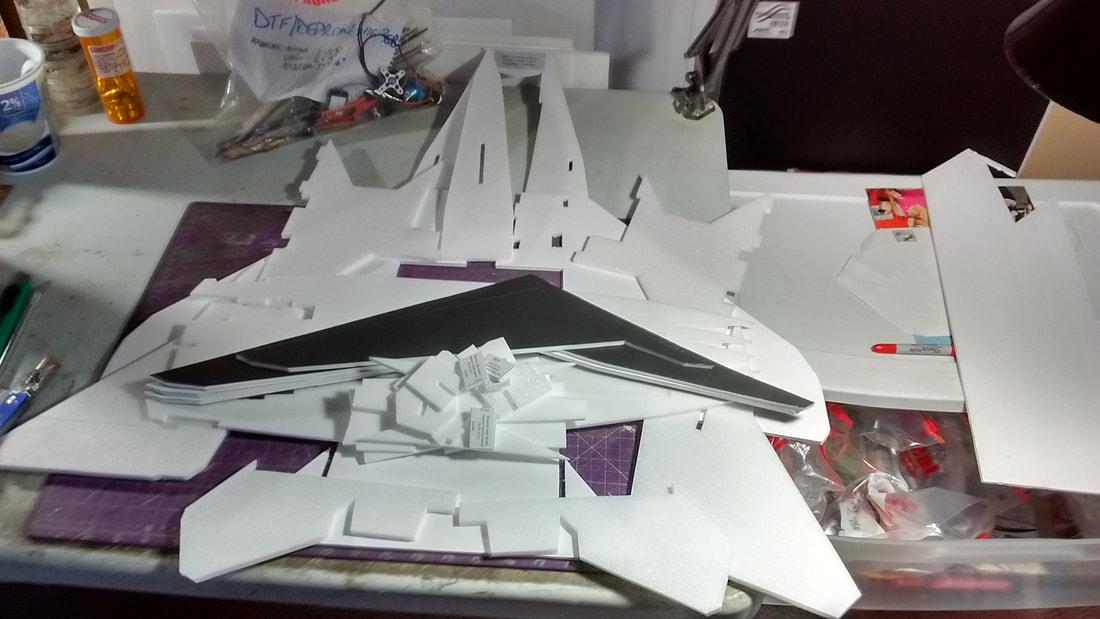
I have already started another Mig-35B, this time built again at 100%, here are all the parts cut out.  This took two sheets of 20x30" DTF and half a sheet of 27"x39" Depron.
Picture
So in this build, the wing plate, fuselage, canopy, back plate and of course KF4 airfoils will be made of DTF, the nacelles, vertical stabilizers and elevons will be made of Depron.

I have moved the motor forward by 1" to compensate for the weight of the paper on the DTF behind the leading edge of the KF.  I won't put any reinforcement in the back plate, I think once the plane is together and the back plate is locked in by the Depron vertical stabs and nacelles, it should be pretty solid.  Since I don't need any reinforcement in the Depron elevons and vertical stabs, I will also save that weight over the other builds.  

I'm excited to see how it makes out, I currently have a 100% Mig-35B in my hangar built with Depron and MPF and it moves along quite well with a peppy little quad racing motor, so I am interested to see if I end up lighter and faster (less drag) with this current built.  Here is some video of the Depron/MPF Mig-35B.
So lots of lessons learned again building with DTF and other foams.  I think since I have them, making the right choices for weight and strength I can save a lot of money building with more DTF, it is readily available to me and I should be able to stretch my supply of Depron and MPF even further 😊  More testing and evaluation to come in the near future 😊

Since originally posting this in the old NAMC blog, I have finished my Depron and DTF Mig-35B and have over 100 flights on it using it as a test bed for several different quad racing motors. Here is some flight video of it with my favorite quad racing motor setup thus far😉
I also recently shot this "Table Talk" video summarizing some of my lessons learned and how I have changed my build philosophy of my park jets with respect to foam, motor and servo choices.


Park Jet noise...the "other" sound of freedom😎
Cheers,

​Scott

Building with Dollar Tree foam - Part 5 - first thoughts on flight performance and durability

Hi Everyone -

This blog post was first written several months ago (April 2017) after my first two flight sessions with this first plane I built completely of DTF. Some of my thoughts and philosophies have changed since this time which you can read about in follow on posts. I thought this post might still be helpful if you are planning on building a park jet completely with DTF😊.
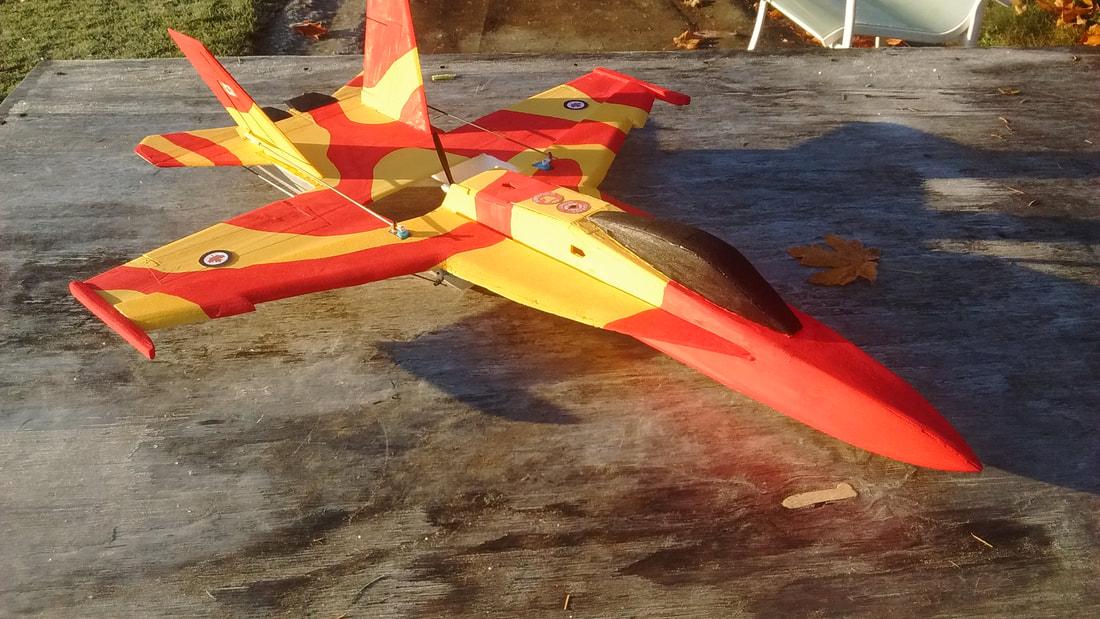
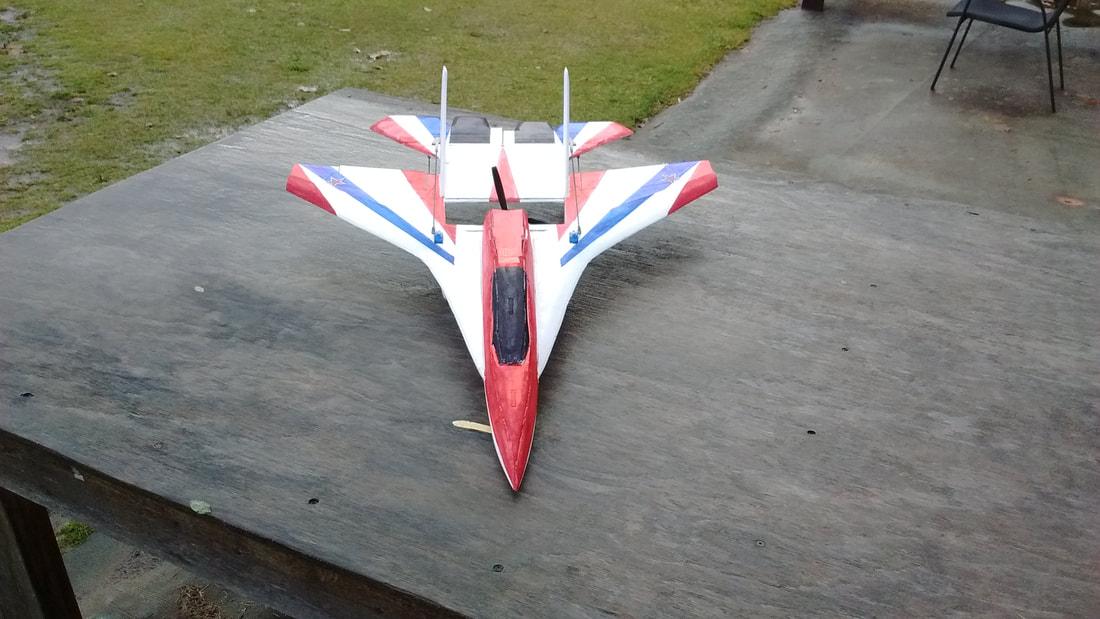
I have two good flight sessions under my belt now with this plane, very impressed with how it looks and flies :)
Picture
Here is some flight video of my initial impressions of this plane.

Drag reduction

I'm very impressed with the quickness and speed of this plane with the drag reduction resulting from building with DTF.  I have toned down my throws in the pitch and roll about 8% now compared to how I fly my other Mig-35Bs that were all built with Depron and MPF so that I don't over control it since it responds that much quicker.

So now that I have just over 20 flights on this plane in calm conditions and in conditions with winds about 10 mph, I have a few ideas why this plane is so slippery in the air which helps make it quicker to respond on the sticks and at top speed.

As mentioned in the video, all the surfaces and leading and trailing edges have been reduced in thickness.  Where the paper is left on the vertical stabilizers/rudders, it is 5 mm thick, so 1 mm thinner that Depron/MPF.  Where the paper was taken off like on the leading edges of the nacelles and wings, the foam is 4.5 mm thick, so my wing leading edge is 13.5 mm thick as compared to 15 mm thick with my other Depron/MPF builds.  Additionally, since I used the same reference line when shaping the leading edge of my wing with the KF4s installed, I ended up with a slightly more shallow angle on the leading edge of the wing which I think also contributes to reduced drag.

With the paper off the fuselage, the width of the fuselage is 3 mm less than if it was built with MPF/Depron.

The surface of DTF with paper on or off is quite a bit smoother than Depron or MPF, it has more of a closed cell consistency, so sanded or not sanded, it is a much smoother surface.  Any areas where the paper is left on of course is also very smooth.

So it is a bit hard to put a number on it, but having flown so many Mig-35B flights built with Depron/MPF, at the same weight and with the same power setup, I would say the drag reduction has increased the maneuverability and top speed of the plane between 5-10%.  All these little numbers add up to making a quicker, faster and smoother flight experience.

Strength and durability

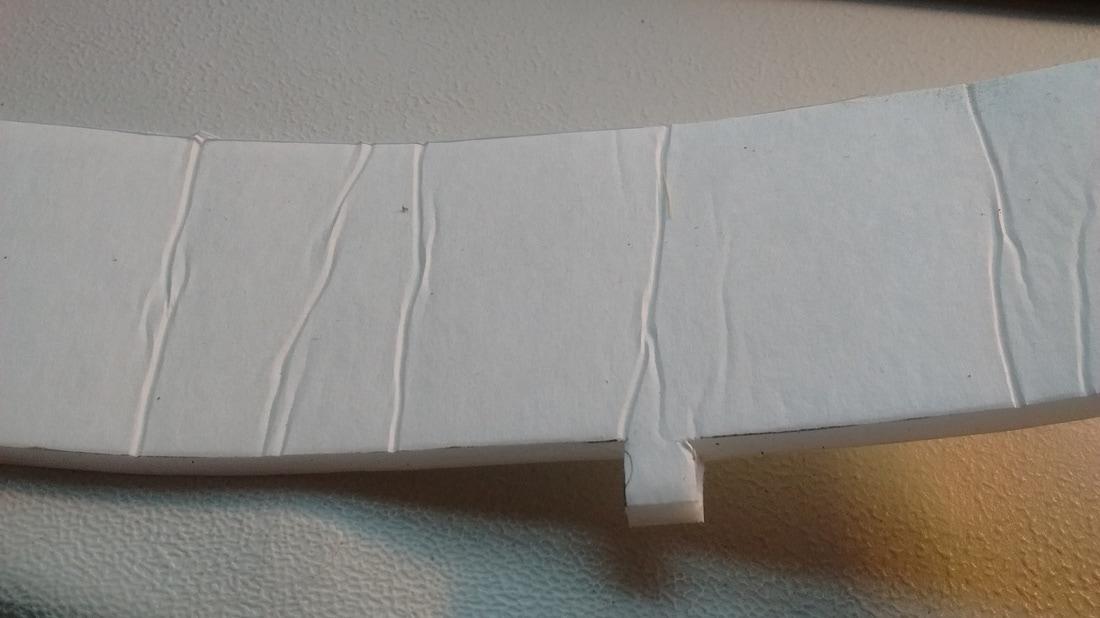
Other than the minor problem with the bottom of the nacelles which I will discuss later in this article, I am very, very impressed with the strength of the foam where the paper was left on, the edges sealed with glue and the paper treated with oil-based Minwax.  Even without the addition of the reinforcement, it is much stiffer than Depron or MPF.  However, I think the reinforcement is still needed in key areas.  The reason being is that even with the Minwax, if the foam gets flexed too far, it crumples and wrinkles as shown in this picture.  Then like soft aluminum, there is always a weak point at the wrinkle that cannot be straightened.
Picture
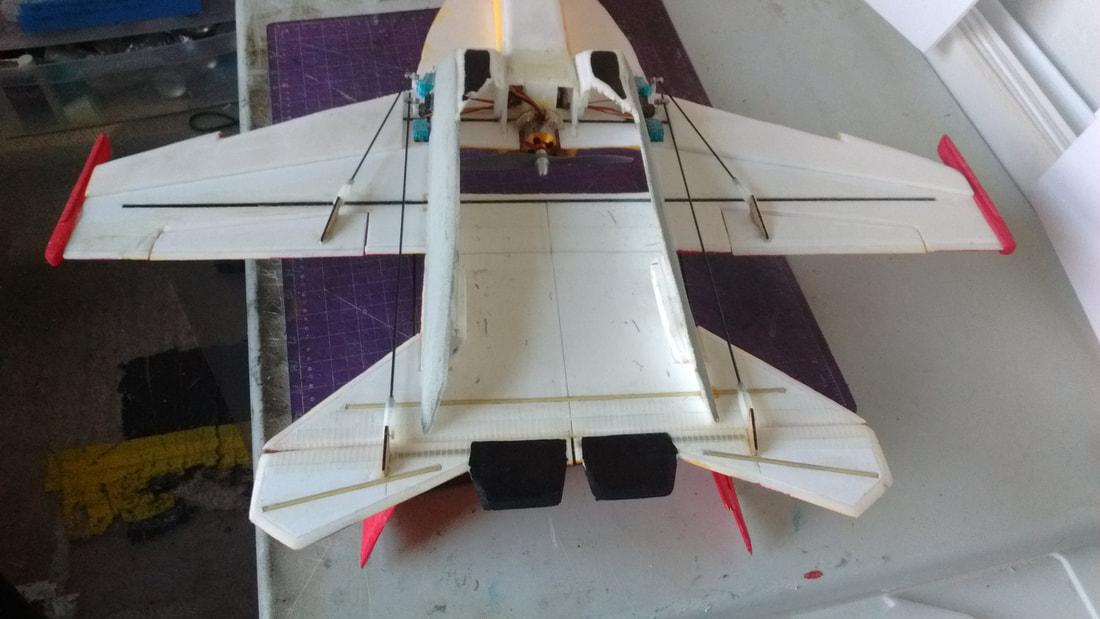
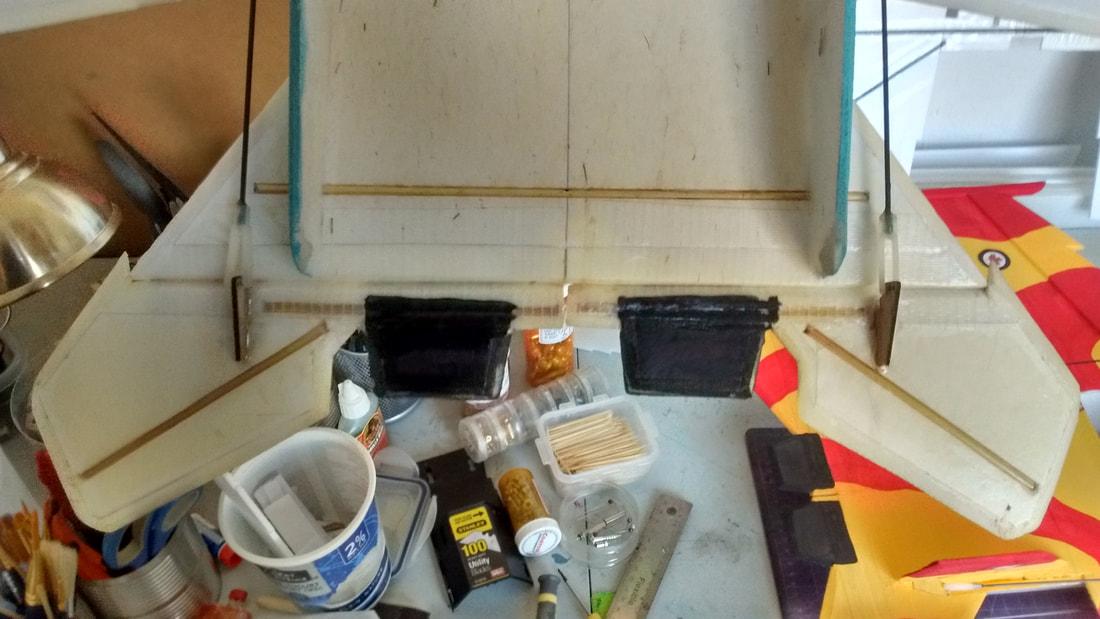
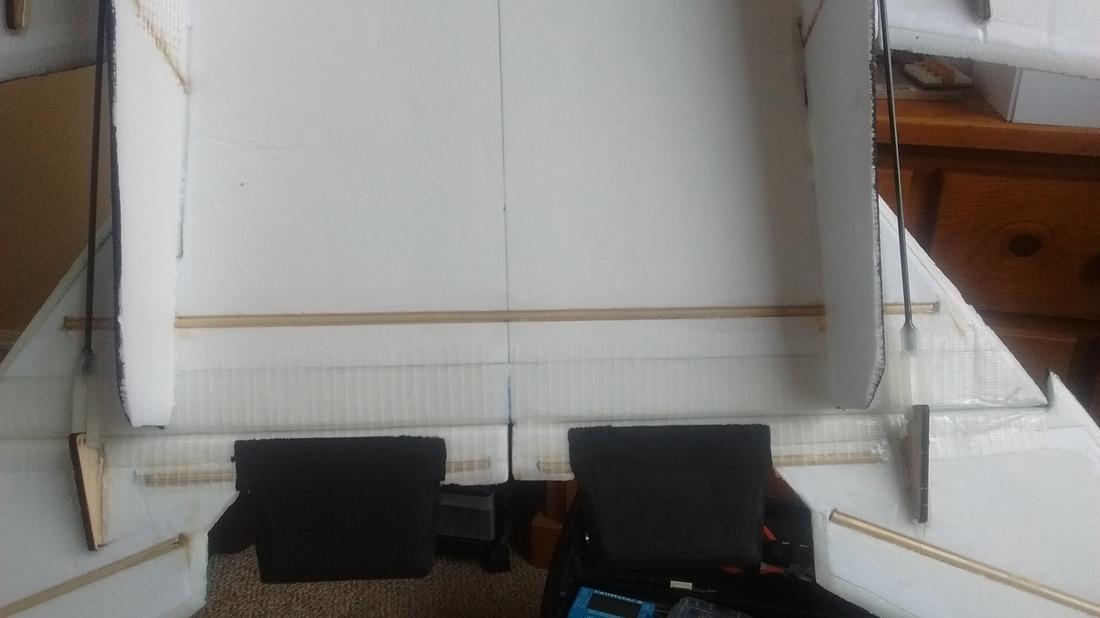
I really didn't add much more reinforcement to the elevons, back plate and vertical stabilizers than I would have with an MPF build.  I did have to put a little extra piece in the elevons that runs parallel to the hinge line as you can see in the picture below just because the narrow area between the "nozzle" and the main control surface felt a little weak to me.  In this picture, you can also see the length of bamboo skewer in the back plate and where the bamboo skewers I put in the vertical stabilizers extend down into the sides of the nacelles.  These are reinforcements I would use if building with MPF, so no real difference there.
Picture
I am very impressed with the strength of the wing, it is just as strong as a Depron wing with the same reinforcements.  I have been putting this plane through multiple tight, high speed turns, doing aggressive pullouts from split S and have yet to see even a hint of wing flex.

During both my flight sessions thus far, there has been a lot of moisture on the ground, so the plane has been wet and thus far I am very pleased to report that the paper is holding up without issue, the sealing with glue and Minwax is working as advertised, so I'm very happy with that.

As mentioned in the video, there are a couple things I would do differently in future complete DTF builds to compensate for the differences in building with this foam.

The paper does add weight behind the CG, but also adds very important strength, so for a complete DTF build, it is just part of the equation.  This requires me with this build to fly with my battery about 1/2" further forward than what I have flown with in the past and my ESC about 2" further forward to get the balance right.  It doesn't feel like it is nose heavy, but at times when slow, I could feel the difference in the moment of inertia over my other Mig-35B builds.  With a longer moment of inertia, sometimes when slow in the vertical or in turns, the nose would wander a bit on it's own.  Nothing scary, but noticeable from my other Mig-35Bs.

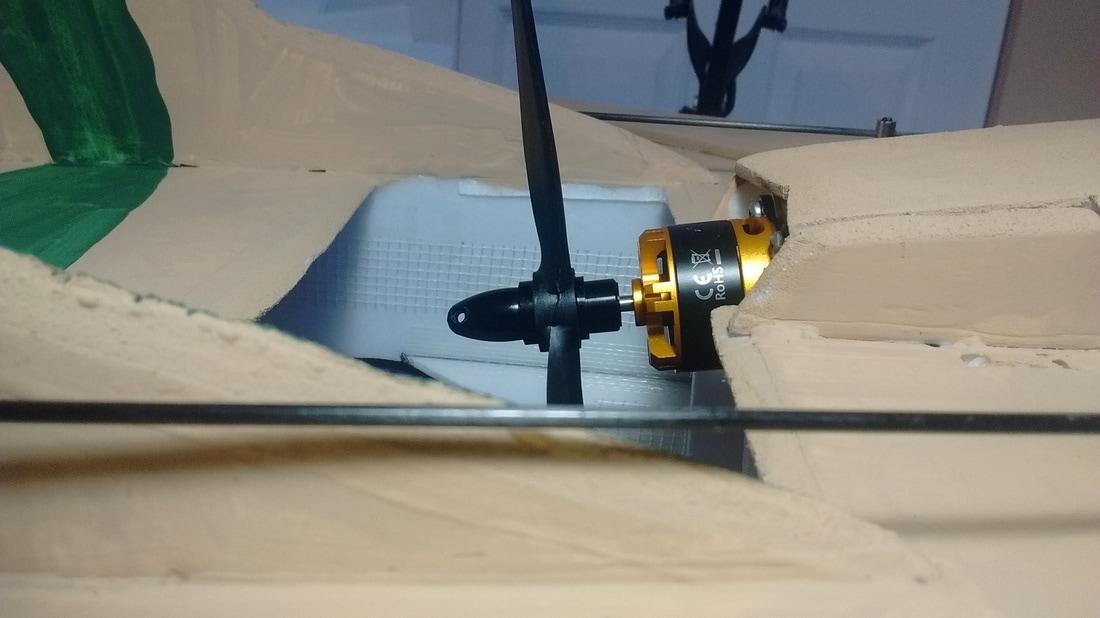
I knew that the plane was going to be tail heavy even before I started putting the electronics in it, as it sat on the table it always wanted to sit back on it's tail.  I installed the motor with some down angle which I'm sure helps drive the nose down a little bit more without needing the battery even further forward.  In the picture, the angle looks a little more severe than it is, if I extend a line from the center of the bullet nut, it would be pointing about 1 mm below the bottom of the back plate.
Picture
So for future DTF builds, armed with this knowledge, I would make a conscious effort to move components like servos and even the motor further forward to help compensate for the extra weight of the paper behind the CG.  This should probably allow me to keep the battery and ESC further back, nicely concentrated around the CG for a tighter moment of inertia.  This may not be required for everyone, but to suit how I like my planes to fly, it is definitely something I will experiment with.  

To solve the flexibility on the bottom of the nacelles, this would be an easy fix I think without adding a whole lot of weight and I already have thought of several solutions I might try in future builds.
  • fiberglass drywall tape along the entire inside of the nacelle, kind of a "poor man's fiberglass";
  • making a butt joint instead of a score and fold joint where the bottom of the nacelle meets the sides, with the bottom resting on top of the sides;
  • putting another layer of paperless DTF along the bottom of the nacelle with some fiberglass tape sandwiched in between;
  • reinforcing inside or outside the nacelle with very thin tongue depressors I can get from the Dollar store.
Any or all of these will help I think and shouldn't add much weight or drag, I will experiment in future builds.​

Moving forward

Having gone through this experience with Peter's help, DTF building will be kept as a very valuable tool in my "builder's toolbox".  

I will experiment more with future builds completely of DTF to see if moving the motor forward and playing with some reinforcement on the bottom of the nacelles helps out with the minor things I have seen with this plane.

I can see me using this for other planes and test beds as the cost is so inexpensive and with the right patience and attention, the strength and durability is so far equal to Depron or MPF.  I will certainly use paperless MPF for my next fuselage on an MPF/Depron build as I'm quite sure that a DTF fuselage is not only lighter than an MPF or Depron fuselage, but as mentioned before in this article, causes noticeably less drag.

I still have lots of MPF and a few sheets of hobby grade Depron I'm hoarding, so using the inexpensive, readily available (for me anyway) DTF will help stretch this supply even further/longer.  The biggest "stick in the mud" for me with MPF and Depron is that I have to order it from the US.  Depending on how the Canadian dollar is doing, this can be a good thing or bad thing 😟  Shipping from the US certainly has not been getting cheaper and accounts for nearly 40% of my delivered cost for both Depron and MPF...yikes!

Certainly the build process to have a nice looking, strong, light and well protected plane with DTF takes longer for me than an MPF or Depron build, but being retired, time is something I have in more abundance than cash 😊

​As I continue to "fly the wings" off this plane over the summer, I will continue to evaluate the durability of the DTF build and report on this thread.

Park Jet noise...the "other" sound of freedom😎
Cheers,

Scott

Thursday, January 18, 2018

Building with Dollar Tree Foam - Part 1 - Background.

Hi Everyone -

This is the first part of a series of articles I started on the old NAMC blog in the spring of 2017 which I wanted to post here on my new blog with some updates.
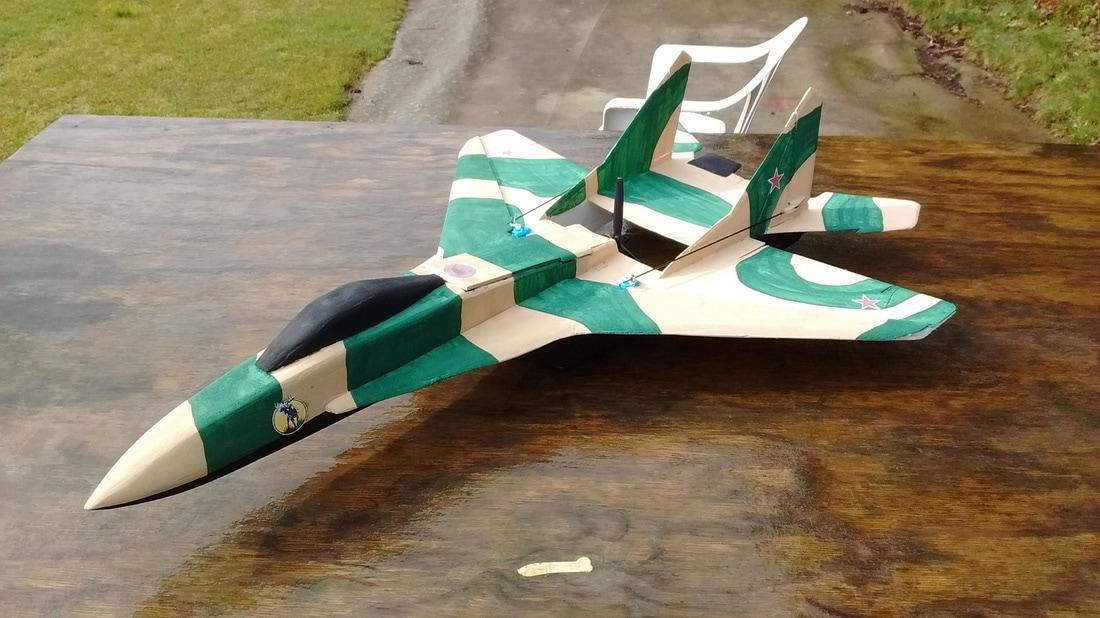
In April of 2017, I completed a Mig-35B built entirely from Dollar Tree foam (DTF) or Adams Readiboard.  I have built dozens of planes using paperless DTF for the KF airfoils, but never an entire build, so it was an experiment I had long wanted to try.
Picture
There are several reasons why I wanted to experiment and build an entire score and fold park jet from DTF -
  • with Hobby grade Depron no longer available in North America, I wanted to explore another option other than Model Plane Foam (MPF);
  • one of the NAMC Su-27 Flanker beta test pilots Peter (homey666 on the RC Powers forum) built an Su-27 with it and I was very impressed with not only how it looked, but how it flew; and
  • it is always fun to experiment with new building materials as it makes me a better builder overall.
I had a few goals going into the build -
  • I wanted the plane of course to look good which gave me a chance to experiment with sanding, finishing and painting a complete DTF build;
  • The plane needed to be strong in order to hold up to my flying style, so I needed a nice strong wing and control surfaces without weighing the plane down.  My goal was to end  up in the 21-22 oz 595-624 gr range with a 2200 3S battery which is my "sweet spot" for planes for planes with most power setups I like to use; and
  • since even in the summer time, I am often landing on wet grass, the plane needed to be waterproof and durable, again without it being too heavy.
Preparation

Peter had already shared some great build tips on the NAMC Su-27 Flanker design, build and test thread and I already had a few ideas from watching Flite Test build videos, however I wasn't exactly sure how I would be able to accomplish my goals listed above.  Fortunately, Peter graciously agreed to help me out, I found a set of Mig-35B plans tucked away in my closet and away we went.

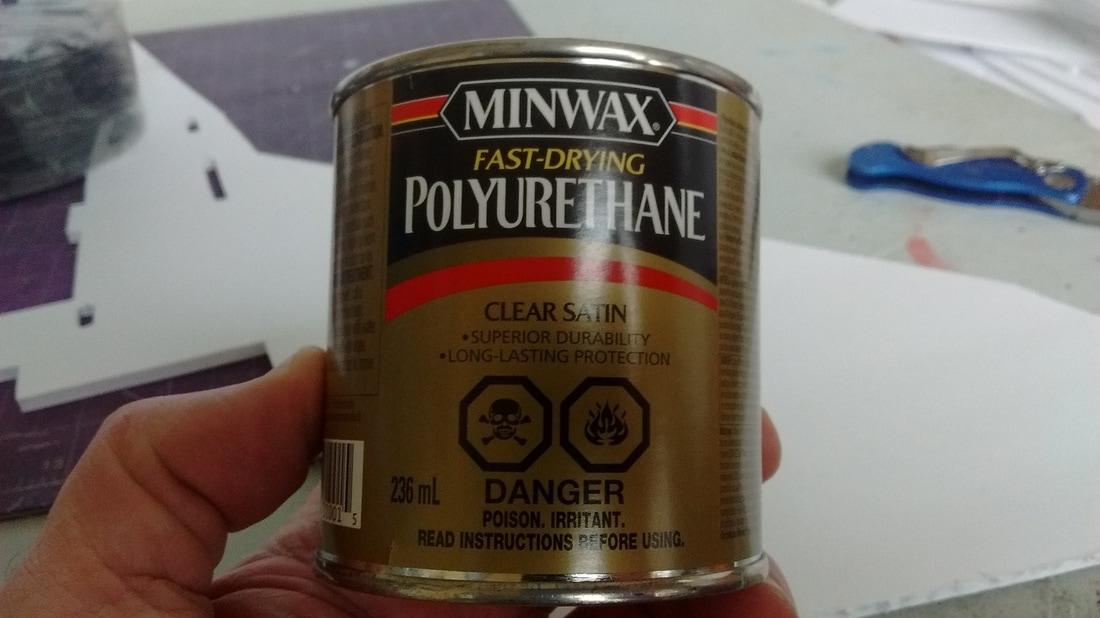
I have a Dollar Tree store in another town about a half hour drive from me, so access to DTF is quite easy.  I procured a few extra sheets to add to my supply and was ready to start cutting foam.  Other supplies I already had and from testing I knew that all the glues I already use with Depron and MPF would work just fine with DTF.  I did need however to get some oil based Minwax to help in the water proofing and strengthening of those areas of the plane where I would be leaving the paper on the DTF.  
Picture
I also found and watched this video from Flite Test (please click on the link, the video is unlisted and I couldn't get it to upload from YT😒)to educate myself on how to use the Minwax to best protect my plane without harming the foam or adding excessive weight.

I cut out the parts for the Mig-35B and after carefully laying them out, determined I would need four (4) sheets of DTF to build this plane including the KF4 airfoils.  I will cover this in more detail in Part 3 of this series.

Cost analysis

Of course we are all probably looking for ways to build our planes better and cheaper, so how would this build compare to my other builds from a standpoint of foam costs?  Unfortunately, because I had to spend about $7 USD on a can of Minwax, it skews the results, but I'm sure I'll find something to use the Minwax for, perhaps another DTF build or two 😊

I still have several sheets of Depron I am hoarding, Depron costs me about $9 USD per sheet by the time it is shipped to my door.  MPF, I actually use Fli-Power Value XPS from RC Foam costs me about $5 USD per sheet shipped to my door.  The DTF costs me $1.25 Cdn or $1.00 USD based on today's exchange rate per sheet and I can buy it locally.

When building with Depron, I use MPF for the fuselage and canopy to save Depron and money.  These builds require -
  • one full sheet of Depron - $9;
  • 1/4 sheet of MPF - $1.25; and
  • one sheet of DTF (for KF airfoils) - $1.00.
  • Total - $11.25
When building entirely with MPF, my planes use about 1 and 1/4 sheets of MPF.

These builds require -
  • one and 1/4 sheets of MPF - $6.25; and
  • one sheet of DTF (for KF airfoils) - $1.00.
  • Total - $7.25
Foam cost for building this Mig-35B entirely of DTF - $4.00.

With both MPF and the DTF I do need more reinforcement than with the Depron build, but I recycle sections of carbon fiber tube or use bamboo BBQ skewers I get from the Dollar Store which cost me about $0.01 Cdn each.

The DTF build did require a bit more glue to seal the edges of where the paper was left on, maybe 1/4 bottle of the Craft Medley glue I now use (a Foam Cure equivalent).  This glue costs me $1.00 USD and I can get it at my local Dollar Tree, so lets round up the DTF build cost to $4.10 not including the Minwax.

​So if I built a lot with DTF, it would be a very cost effective way to build financially and I can always get more foam locally without needing it shipped to me.

Before getting further into the build process, the next part of this series of articles will discuss my experimentation with Minwax.  As the use of Minwax was an entirely new building process for me, I wanted to do some experimenting before applying it to a completely built plane in case there were issues, so the next article will cover Minwax lessons learned.

Park Jet noise...the "other" sound of freedom😎
Cheers,

​Scott