If you have been following this blog and/or my YouTube channel, you may know that I often will downsize a plane from it's "stock" size(what it would be if printed at 100%). Since I have been using quad racing motors in my planes I do this quite often as I like the planes to be a little smaller to compensate for the lower torque and of course to help them go faster😃😎
Most park jet plans come in "tiled" (you print them off at home and then tape the sheets together to make one large sheet of plans) or "untiled" where you can send them to a professional printer and have them printed. Unfortunately, most designers "lock" their plans, so without a password, you can't get them downsized by most print shops using the "untiled" format. However, there are a couple of options I have found that work well using your home computer and printer.
I am using Windows 10 on a PC and always have, if you use a Mac or other operating system, I'm not sure if your print window will look the same. I have taken pictures of my computer screen, I apologize the pictures aren't terribly clear, but hopefully it will help you out.
Tiled
If you decide to use the tiled plans, the only option is to downsize. I have had reasonable luck with these aligning for most park jet plans.
So using an RC Powers Su-30 V4 set of plans as an example, if I want to downsize to 85% lets say, once I enter the print window, I go to this area and select 85% under Custom Scale.

I also like to select Print in grayscale and Save/ink toner as there will be several sheets printed and I like to save as much ink as possible😃

When you look in this area of the window, it will give you what size the printed area will be on each sheet of paper (this is based on 8 and 1/2 x 11", I'm not sure if it does the same thing for A4, most plans are based on 8 and 1/2 x 11"). You can always print off one sheet to see how it looks, then if you are happy print the whole plan off and then trim and tape together.

I have found more often when doing it this way that there might occasionally be places where the parts don't line up exactly, so you have to take some care to "extrapolate" a bit when taping together or cutting the foam to get good pieces from which to build your plane.
Untiled plans
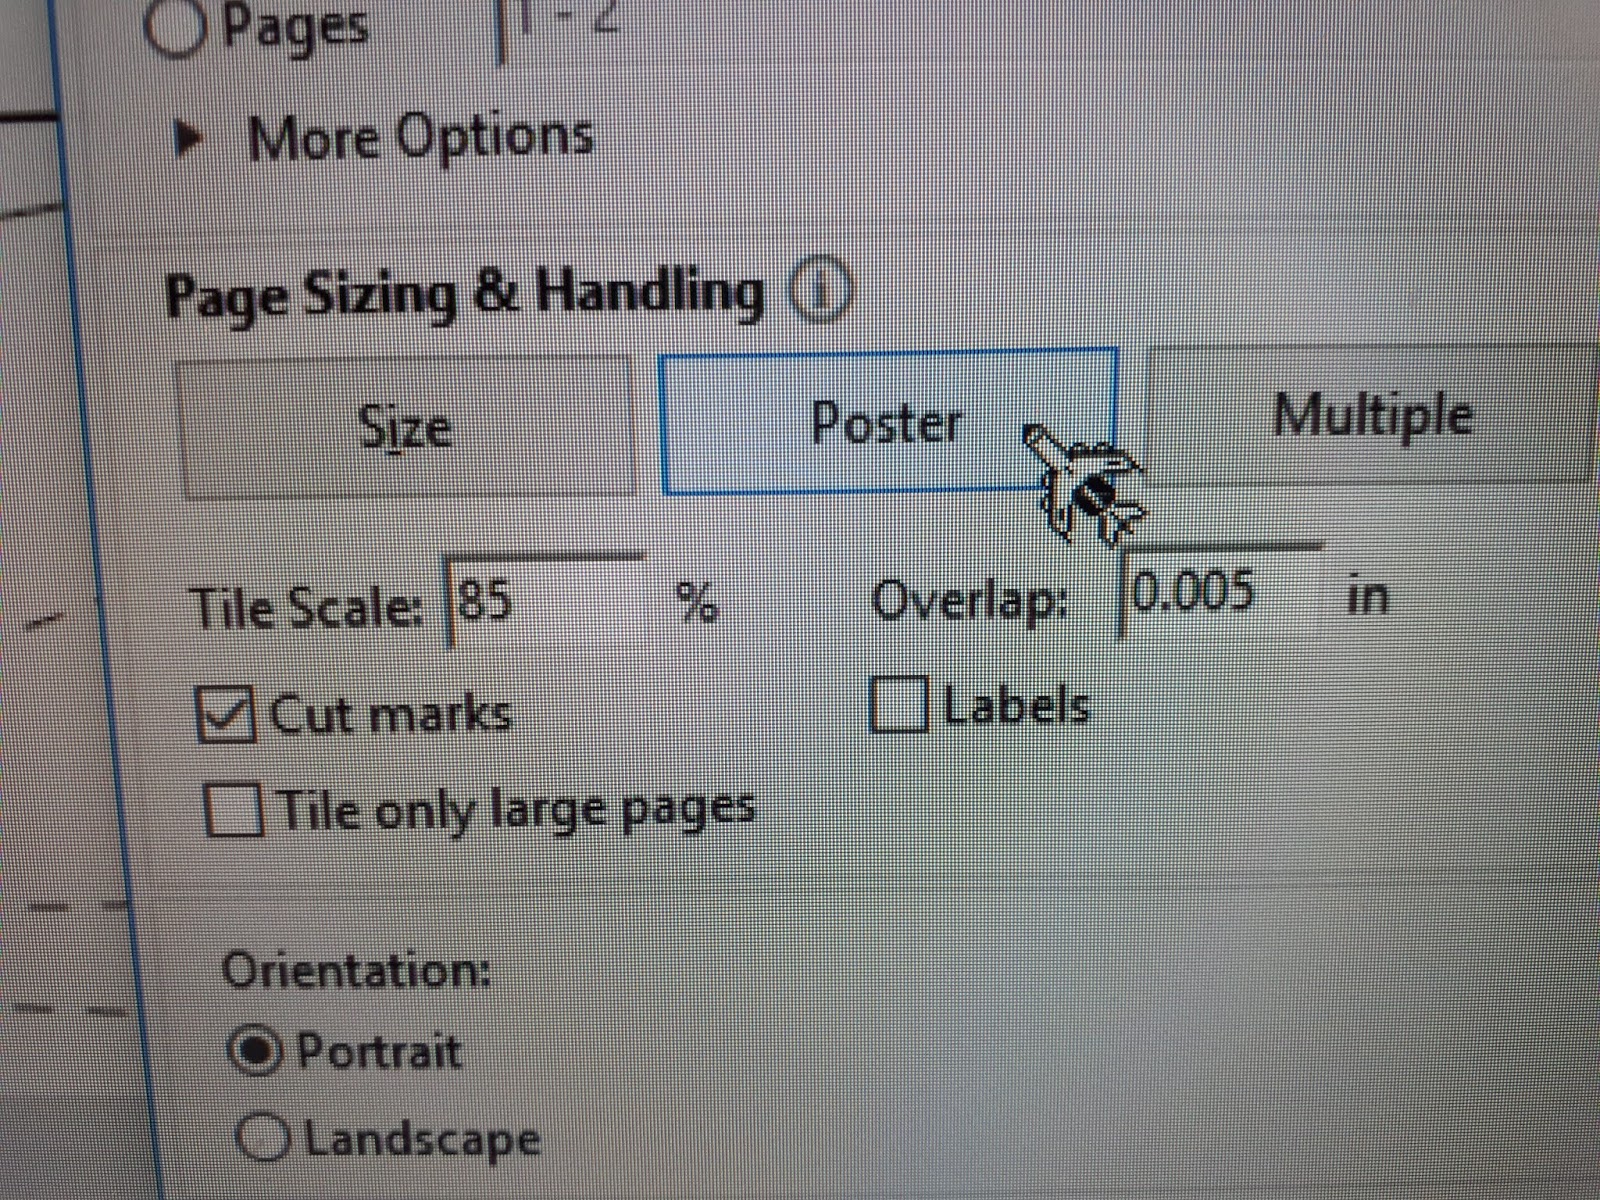
I seem to have the best luck getting the plans to line up using the "untiled" plans and printing them using the Poster function in the print window, so that has become my choice for resizing plans I have to print on my home printer.
After selecting Print, go to "Poster" and you will see these selections. Put in the scale you want in the Tile Scale window, I leave the Overlap the way it is and then select cut marks. The cut marks will give you small guide markers to help aligning the pages. You may still need to trim and tape the pages together just like when using the "tiled" setup.
After selecting the scale you want, you can click on the right side of the print window in the area where you see the magnifying glass with the "+" sign. It will calculate how many sheets of paper will be required to do the job. The dashed lines show how the original "untiled" plans will be divided into individual sheets of paper that will then have to be taped together so that you can cut out the parts.

Again, if you want to minimize the amount of ink used, select Grayscale and Save ink/toner as described above.
Although I have never tried it, you should also be able to "upsize" plans using the "untiled" plans and this method. Just as an experiment, I typed in 110 in the Tile Scale window.

As you can see below, this results in several more sheets of paper being required to print these larger plans.

Cutting plans after resizing
One thing you do need to be conscious of when cutting out the plans after resizing is ensure that the slots you cut will fit the foam you are using. I have found that normally when downsizing, if I cut the slots along the outside edge of the black line that denotes them, most foams will fit snugly. Better to cut a little narrow as you can always gently pinch the foam of the tabs to get things to fit when you do your dry fit, but cutting too big and the plane will not go together easily.
Cheers,
Scott