Showing posts with label Parkjet blog. Show all posts

Monday, December 11, 2017

RC Powers F-22 V5 build and review - Take 2

Hi Everyone -

I had this little beauty out for a good thrash, reaching the 100 flight milestone on this plane😊  Between the two RC Powers F-22 V5s I have built, I now have 300+ flights, it is my favorite of the RC Powers V5 series of park jets.
This is the second F-22 V5 I have built, the first one was built of MPF, this one is build mostly of Dollar Tree foam (DTF or Adams Readi-board) and some Depron, I'll cover more details in a bit.  Here is some video of my first build with a discussion of the mods I made.  You can also read further details on the NAMC blog, hence why I called this blog post "take 2"😊

Here is some flight video of my current plane shot just awhile ago with the current setup I am still using.


Here is a "table talk" video I did that discusses much of what is below, however as mentioned in the video, you will find more pictures and actual measurements below if you are looking for ideas or inspiration to try your own mods😊


So learning from the first build and some of the DTF builds I have done recently, when I decided to build another, I chose to build the wing plate, fuselage and vertical stabs of DTF.  The "engine/nacelles" on the bottom are made of 6 mm Depron  (the parts with the black lines and light blue paint in the picture below)  The "under rudders" are also made of Depron.  

I again downsized the plans by 5%, so my wingspan is now 27"/686 mm and my plane is 36 and 1/4"/921 mm long.  I like this size as it fits in well with most of the other planes I have in my "hangar".

Current power setup -


Prop - 6x4 APC gas;


Battery - 2200 3S 40 or 45C, I have a couple different types I use.

Controls -

Elevons controlled by two RC Timer 9 gr nylon gear servos;

Ailerons and rudders controlled by a total of four RC Timer 5 gr nylon gear servos.

My current AUW with a 2200 3S battery is 20.9 oz/592 gr.

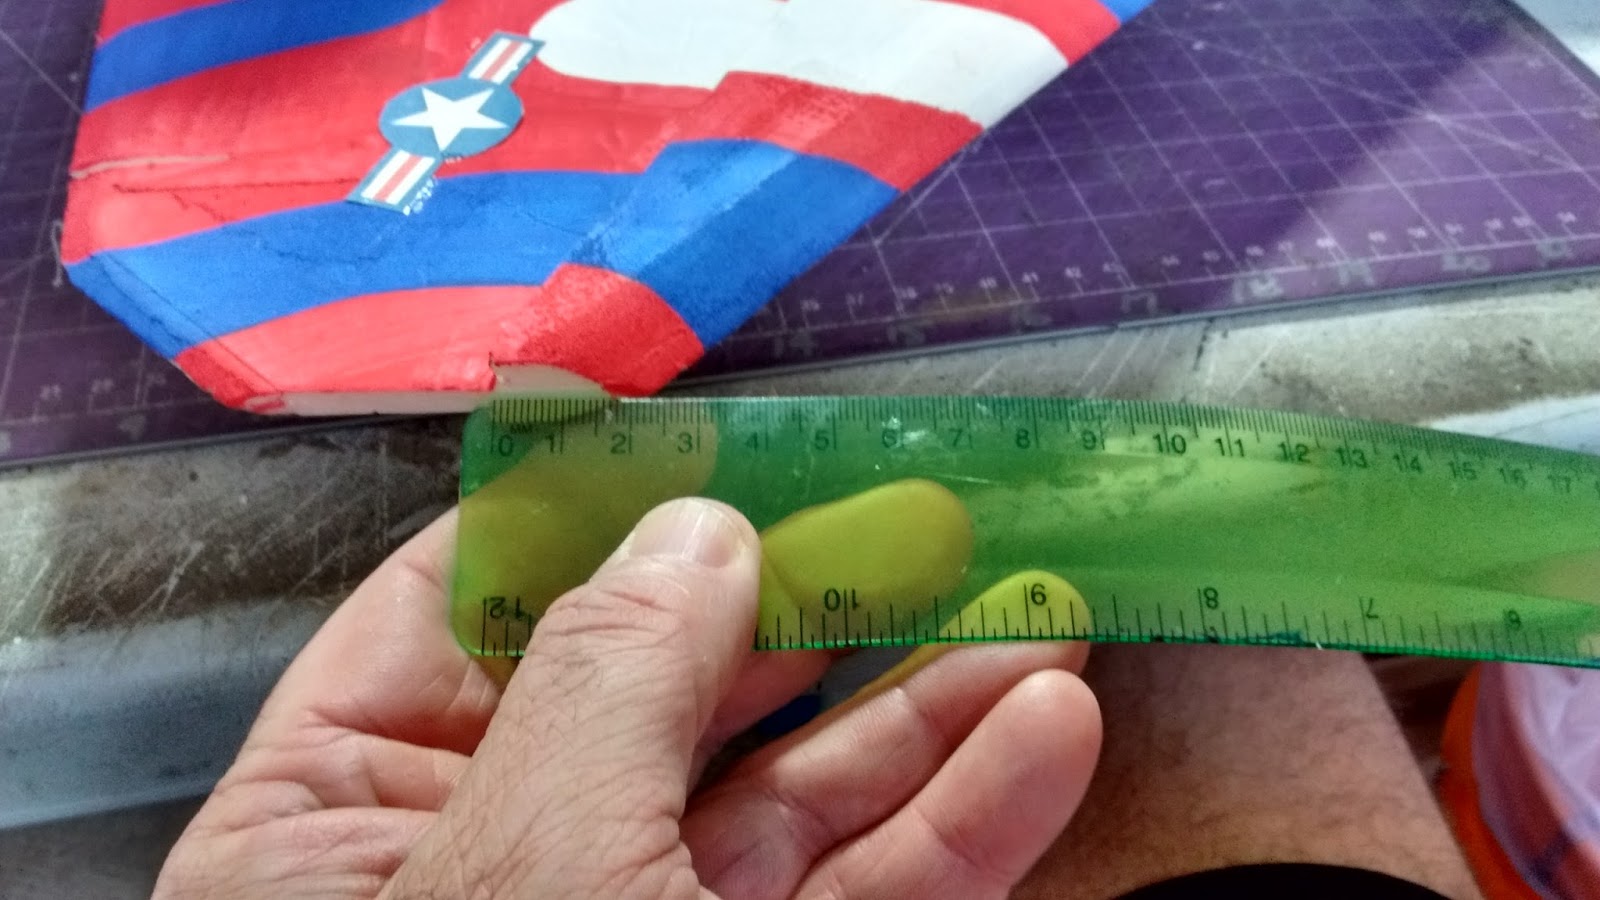
My current throws are as follows, I should mention that I fly with fairly low expo, 15% in the pitch and roll and 20% in the yaw, setting them at "just enough" to allow me to fly how I like to fly with a little extra in the pitch if I need to avoid contact with the ground, tree, fence, me😉  -

Pitch - 3/4" one way;

Roll - Elevon - 5/8" one way, Aileron 1/2" one way; and

Yaw - 1 and 1/2" one way.

Here is a series of pictures showing where I held the ruler to make these measurements for reference.


Build modifications

I will start at the nose of the plane and work backwards.

As I did with the first F-22 V5 I built, I made several mods not including downsizing it by 5%.  Some of the same mods followed into this build with one or two more.

KF airfoils.  I resized the KF4 airfoils somewhat, mine are about 40% of wing chord at the wing root measured where the wing meets the fuselage and about 35% of wing chord at the tip.  From all the testing done with the NAMC Mig-FA and Mig-35A, this is my favorite setup for the majority of park jets I fly.  I did have to do some careful checking since I was moving the motor forward by 1" and adjusting the leading edge of the prop slot to accommodate shorter quad racing motors as you can see in this picture, not a whole lot of room there😊
The measurement of my top KF airfoil along the fuselage where the ruler is showing below is 10 and 5/16"/262 mm.
At the wingtip, the KF measures 7/8"/23 mm.
On the bottom KF, along the side of the "engines", it measures 4 and 7/8"/120.6 mm, same measurement at the wing tip as the top KF.
Ailerons.  As mentioned in the video above, I resized my ailerons to suit how I like my planes to handle.  I have found that ailerons that span 60% of the trailing edge of the wing gives me the "feel" that I like in my park jets.  I put the inside of the aileron where the red line is shown where it was on the plans and lengthened it to 1 and 3/4"/44.5mm.  Where the white line is along the trailing edge of the aileron, it measures 5 and 7/8"/149mm (I think I said the wrong number of mm in the video, sorry😞.  Where the black line is on the outer edge of the aileron, it measures 1 and 1/8"/28.5 mm
As mentioned in the video, I lowered the battery down as low as I could get it while still keeping good strength in the bottom of the fuselage.  Where my battery attaches to the plane is now 1 and 1/4"/31.75 mm below the bottom of the wing plate.  I think this is crucial to making this plane as stable as possible without causing any handling issues.  It definitely makes it far more stable and "self righting" if I get too slow or get myself into trouble.

The motor is moved forward by 1" and I trimmed about 3/8"/9.5mm off the leading edge of the prop slot after moving the motor forward.  This is to help accommodate shorter quad racing motors.  This ensures proper clearance between the leading edge of the prop slot and the prop, improving performance and reducing noise.

As mentioned in the video, I "shimmed" the motor so that it angles down to help prevent "zooming" as the plane accelerates to top speed.  Hopefully you can see the washer where the tip of the hex driver is pointing.  This washer is about 1mm thick.  I would still always mount the motor and motor mount square and straight first, then shim as you need to so that you don't have to purposefully fly nose heavy or carry around a bunch of down trim.  I just like my planes to stay level and blast ahead full speed when I hammer the throttle and not climb or dive as they accelerate😎
As mentioned in the video, I trimmed about 1/2" off the top of the vertical stabilizers to help reduce drag a bit and improve roll performance.  I might experiment with downsizing them even more in a future build, I'm not sure.

As mentioned in the video, current CG location as balanced now is about 1/2" ahead of the stock location or the center of the "CG spectrum" that RC Powers puts on their plans these days.  Here is a picture of the "CG spectrum" for reference, I think this was from my first F-22 V5.
On all my V5s from RC Powers, I start off with my CG marked dead center of the solid black rectangle, so looking back at this picture, the CG moved forward considerably on both my F-22s.  Here is where the CG is located on the current Raptor.  The toothpick indicates where the starting point was, the "T" pin indicates where my plane balances best.
I can't think of much else to share with you at this point that hasn't been either covered in the video or in this blog post.  

I am certainly very pleased with the DTF and Depron build, both foams working and holding up very well.  This version certainly is "slipperier" than my first one built out of 6mm MPF (Model Plane Foam), so it flies really well even with smaller quad style racing motors with the reduced drag.  It is holding up much better than the original all DTF Mig-35B I built and is strong and stiff, so as I learned from previous builds and carried over to builds after this one, combining DTF with other foams for strength and drag reduction is definitely the way ahead for me😊

The F-22 V5 is my favorite of the V5 series as it is such a great all round flier and that F-22 plan form looks pretty cool in the sky😎

If you have any other questions about my build or setup, please leave them below, or if you want other pictures I might have of my build as it went along, please feel free to e-mail me at scott.parkjet@gmail.com.

Park Jet noise...the "other" sound of freedom😎

Cheers,

Scott


Saturday, December 9, 2017

6x4 APC gas prop - the new "super prop" for park jets?

Hi Everyone -

If I was to give my reward for "Park Jet prop of the year for 2017", it would have to be the 6x4 APC gas prop 🎆  I've only just come to start using this prop in the last month or so, but it has been a real game changer for me in the performance of my planes across the board.  Again, I must thank rcplanepirate from the UK who has done and continues to do a massive amount of prop and motor testing.  I encourage you to go check out his channel here.  It was from watching one of his videos that I decided to give this prop a try and haven't looked back since 😄

If you watch my YouTube channel, you have heard my excitement over this prop already, but I wanted to shoot a "discussion" video of why for me this is definitely my new "best" prop across all the motors I have tested with it already.
Here are the links I discuss in the video which are also in the comments if you watch the video on YouTube, but since you have taken the time to read my blog, I'll put them here.  The link to rcplanepirate's YouTube channel and to where I buy my 6x4 APC gas props are already in the first paragraph.

The prop discussion video I mention by rcplanepirate was very educational and thought provoking for me and he also shows bench testing at the end which is very interesting.  Starting at about 27:10 in the video, he tests a 6x4 APC electric prop followed by the 6x4 APC gas prop, slightly more thrust and less current draw.

Here is a list of links to the motors discussed in this video, the 2212/6 2200 Kv motor I discuss in this video is essentially exactly the same as the popular Turnigy D2826/6 2200 Kv motor other than price.  I have found from experience they are interchangeable in my planes with little to no difference in performance.

2212/6 2200 Kv motor  Banggood consistently has the best price around, although you might find them cheaper on EBay, but for $4.99 USD, tough to beat the price😊  You do need to provide your own connectors with these motors to connect to your ESC as they don't come with them.  In the very near future, I will be doing a video and article on this "workhorse" of park jet motors.

DYS BE2208/7 2600 Kv motor  This motor is a bit more expensive than a couple others on this list, but it is light, powerful and has very smooth bearings.

A2212/5T 2700 Kv motor  A real powerhouse for the price at $6.43 USD, you do need to provide your own connectors again.  It is available all over the internet.  I have tested ones from EBay and Banggood, however the two I got from Banggood ran insanely hot on 3S, so if you buy from them, please check the motor regularly after use for heat build up.

BeeRotor BE2207 2780 Kv  This is one of the first couple of quad racing motors I picked up for testing in park jets, it is light and powerful but the least efficient of all the motors mentioned in the video.  However, it really cranks out great power with the 6x4 APC gas prop.

As mentioned, I maintain a Park Jet motor test spreadsheet that you can save as a bookmark and refer back to when you need to.  I have kept this up for a few years now, so there are lots of other motors on that spreadsheet as well where you can see the test data I collected if you have one or are considering buying one.  As I add test data to the spreadsheet when my quad racing motors arrive on the slow boat from China, I will be writing blog articles and letting folks know that the spreadsheet has been updated.  The current date will always be updated on the first page of the spreadsheet so that you can know which version you last reviewed.

So last year I guess my "prop of the year" would have been the Master Airscrew 6x4x3 and I still like it with the lower 2200 Kv motor depending on the plane and flight performance I seek, but it is limited to motors at or below 2600 Kv in my experience.  So the 6x4 APC gas prop is definitely a winner for versatility for me as well as thus far it has performed exceptionally well regardless of the Kv of the motor.

So I encourage you to check it out if you can get hold of a 6x4 APC gas prop.  I certainly get no "kickback" for recommending them, but you might find for the expense of a couple extra bucks that it might be a big game changer for the performance of your park jets as well😎

Park Jet noise...the "other" sound of freedom!

Cheers,

Scott

Thursday, December 7, 2017

Lessons learned about flying in colder weather

Hi Everyone -

Baby it's cold outside!!!⛄ To fly or not to fly?!
Well, I will always fly when I can, no matter the conditions (except rain and/or too much wind), but I have learned several lessons about how to keep myself warm (I'm 56, so I hope I know to do that by now!), but most importantly keep my planes flying and my gear operating safely and properly when the mercury starts to drop.  Now I know some of you will say, "why not just stay home and build something or fly the simulator?!"  Well, I'm actually pretty lucky where I live on the west coast of Canada and other than when we have some good wind and rain, I can fly pretty much all year round.  Although the conditions in this video were a bit extreme...I walked away with some flights done and my planes intact👍
The benefit of most winter flying where I live when it isn't raining, windy or there is freezing fog is that the air is normally dead calm and nice and dense which makes for some velvety smooth flying.  Plus, most of the sane folks in my flying club stay at home, so I pretty much have the field to myself to "yank and bank" to my heart's content.

Now luckily, I have a clubhouse at my flying field with a wood burning stove in it and a very good supply of fire wood, so I can get a fire going, have a place to keep most of my batteries warm and go inside to get myself warmed up if I start to get too cold.
Obviously, you have to be your own judge of what you and your gear can handle, but I have flown in conditions as cold as -7C/19 F and often right around the freezing mark and have enjoyed endless hours of fun without doing too much damage to myself or my planes.  However, there are some guidelines I follow and some lessons learned I will share with you now.

Taking care of myself

I have lived in some pretty frosty places in my life in Canada, so I'm relatively cold tolerant (though as I get older I like it less and less), but I have learned to dress accordingly to keep myself comfortable and able to keep flying without too much problem.

As you normally hear about dressing for the cold, best to dress in layers so that if it ends up being warmer than you thought, you can strip a layer or two off.  Nothing gets you colder than starting to sweat and then having your clothes get wet, lesson learned far too many times for me!

Starting at my feet, I wear some nice warm boots with thick duffle sock inserts.  When I was a kid we called them snowmobile boots as that is what most folks who drive snowmobiles in winter wore.  I got these ones fairly cheap at Walmart (about $20 I seem to remember).
Since I spend a lot of time just standing around when at the field, important to keep my feet warm and dry to extend my flying day.  I guess you wear whatever pants and or long underwear you need to suit your conditions and your cold tolerance.  Up top, I normally wear a longer sleeved shirt under a sweatshirt with a durable nylon vest on top of it all (more on why I chose the vest and don't zip it up later).
On my head, I normally am OK with a ball cap, but luckily my sweetie got me one of these BUFFs for my birthday that is very versatile and I can show my support for my favorite NHL hockey team!
You can see I am wearing it around my neck in the picture above, but because it is a tube, I can also pull it up to cover my ears, wear it like an ear band to keep my ears warm and still have my ball cap protect my eyes from the sun.  

Since our transmitters are made mostly of plastic and metal, they can act as "cold sinks" and your hands can get pretty cold, pretty quick, not a good thing.  I have experimented off and on with thin gloves or gloves with the finger tips cut off, but they never felt that comfortable to me and I didn't have the right "feel" in holding my transmitter or working the sticks.  However, in between flights if my fingers are getting cold, I will pop these synthetic fleece gloves on that I got at the dollar store.
They are warm and toasty and get my hands warm pretty quick and keep them warm if I'm not flying for awhile.  Plus, since I only paid a few bucks for them, if I forget them at the field and they "walk away", I'm not out a bunch of money.  Another trick for keeping hands and even feet warm is those little chemical hand/feet warmer packs you can buy at big sporting goods stores.  A couple guys I fly with use them all the time and they keep warm for several hours.

I also normally have a thermos or an insulated travel mug with a hot beverage that helps keep me warm on the inside as well.  Black, strong coffee is my "jet fuel" of choice👌

Taking care of my planes

Although I didn't today (I made the mistake of believing the forecast...oops), if I think weather and the field conditions will be less than ideal in the winter, I will take a "beater" plane that I normally build and fly a lot in wintry conditions.  This year I built an 85% RC Powers Su-30 V4.  I built this plane solidly to perform, but didn't waste anytime on a paint job, used old gear that still worked but I wouldn't worry if it got damaged or stopped working and I'm not too worried if the plane gets a little banged up.  What is kind of ironic is whenever I have built a "beater" plane like this, they end up being amazing planes that I often fly well into the summer months.  They never seem to let me down :)
By necessity, I store my planes in an unheated garage, so they are already cold soaked when I put them in the car and the ten minute drive to the field does nothing to warm them up much.  As you might imagine, the foam and glue joints can actually get a bit brittle when frozen, so extra care needs to be taken when handling and transporting them.  Like many folks, I have probably done more damage to my planes getting them in and out of the car than at the field, especially when they are cold.

The ESCs and motors don't mind the cold too much and I've never had either of those give me much grief, however batteries and servos can be another matter 😓

Taking care of my gear

When plastic/nylon gear servos are very cold, it is very easy to damage them if being too aggressive when they have not had a chance to warm up with use.  For the first couple flights, I tend to fly a bit more conservatively to allow the servos to warm up and let the foam either warm up in the sun a bit or not have too much stress put on it too quickly.  I have been lucky and not stripped too many servos in my park jet career, but when I have it has always happened when the weather has been cold and I have been too aggressive too early in the flight session.

Batteries are the one item that can cause issues when the weather is cold.  I have found from experience that Lipo batteries seem to be happiest between 5-25C or 41-77 F.  Outside that temperature range, I try to either fly a bit more conservatively (often hard for me to do...😏) or I reduce my flight time by about 30 seconds.  I normally set my timer for 5 minutes, so if it is really cold and I still want to turn and burn, I will set it for 4:30.  The reason for this is even if the battery is fairly warm when I put it into my plane, it gets pretty cold pretty quick in the air and I have found if I run them too long, the cells can discharge at some goofy rates and this is not good for the long term health of my battery.

As I mentioned before, I have a clubhouse with a wood stove, so once I get a fire going, I store most of my batteries in there to keep warm and then go grab a few at a time as I fly.  This also gives me an opportunity to warm myself if need be.  The couple of batteries I grab so I don't have to keep walking back and forth I keep in the pockets of the vest shown in the picture above.  This keeps them close to my body and they don't get too cold and if something happens, I have three layers of clothing between myself and my body and by not zipping the vest, I can shrug it off very quickly so as not to hurt myself if something happens with one of the batteries.  I used to keep them in my pants pocket, but when I read of a fellow almost burning his "bits" off when a Lipo caught fire in his pants pocket, I keep them in my vest pockets now.  I also ensure I have no keys, coins or anything else metal in those pockets to prevent the chance that might come in contact with the battery leads and cause a short/fire🔥

Before and after flights

When landing on frosty runways or even in a little snow, there can be some ice that builds up in the "intakes" of some park jets.
Before launching my plane, I always check for this and remove it as when it becomes dislodged from the airflow, it can nick my prop or cause significant damage to the foam in the rear half of the plane.
Also, I check the inside of the electronics bay, especially if there is some snow around to make sure any ice/frost/snow is removed before the next flight.  The only time I have "cooked" an ESC at the field, I had some snow in the electronics bay, some of which must have got under the heat shrink around my ESC, melted and shorted it out.  Fortunately, all I lost was the ESC, but it could have been worse shorting the battery...yikes!

I have flown when there is snow on the ground and if it gets a little rough and icy, I will put some duct tape around the front of the intakes and any other spot where the foam might get torn up by sliding across the rough unforgiving ice and snow.
Well, there you have it, these are some lessons I have learned from several winters of flying.  As I mentioned, I guess we all have to be the judge of where we make our weather cutoff, if you aren't really confident in yourself or your gear in colder conditions, better to stay home and fly another day.  I am blessed with a clubhouse I can heat by lighting a fire which is a big plus when need be, but I have had many, many hours of enjoyment flying in the cold when the air is dense and velvety smooth.

Park Jet noise...the "other" sound of freedom😎

Cheers,

Scott


Welcome to my Park Jet blog :)

Hi Everyone -

I humbly welcome you to the first post of my new Park Jet blog.  I have been part of other park jet style blogs in the past, but decided it was time to start fresh and new with the New Year 2018 coming up and strike out on my own.

A little about me, I'm retired from the RCAF (Royal Canadian Air Force) after serving proudly for almost 30 yrs as an Aerospace Controller.  Basically that meant talking to airplanes (well the pilots in them actually, if they caught me talking to planes, I might have been kicked out 😌) in many different capacities.  I worked as an Air Weapons Controller which in the US Air Force would be called an Air Battle Manager and in many other countries a fighter controller.  I also worked doing Air Traffic Control going from sitting underground in a dark room staring at a scope talking to fighters to a room with a view👍 My final job before I retired was as a Mission Crew Commander (MCC) on board the E-3 Sentry AWACS (Airborne Warning and Control System) stationed at Tinker AFB in Oklahoma, this time doing my job from about 29000 ft up ☺  Hence why if you follow my YouTube channel or have read any of my posts on the RC Powers forum, I use the nickname e3Scott.  Here is my mandatory Air Force hero shot taken just before I retired standing on the steps at the back entrance to an E-3.
I have currently been in the RC hobby for about seven years although early on I had to take an extended sabbatical to deal with some life issues.  Since getting back on track, I have been flying RC consistently for about five and a half years, flying my first park jet five years ago this month.  RC Powers was what got me into this hobby.  I have been a die hard fan of fighter jets since I was a small boy and have been lucky enough to have several back seat rides in the real thing during my Air Force career.  No amusement park could build a ride to compare with that!  Still to this day I get chills up my spine and a smile on my face when I see and hear a fighter jet fly over.  Just something about the mixture of graceful movement and raw power that fascinates me. So when I saw what RC Powers was doing and how inexpensive it would be to build and fly my own foam park jet, I was hooked and have been incredibly passionate about park jets ever since.

So on to the star of the blog, park jets✈  So what is a park jet you might ask?  Well, like many things in life, they come in all shapes and sizes, here are a couple of my favorites below.

Essentially, they are scratch built RC (radio control) planes using electric motors, normally built with foam, reinforced with carbon rod/tube or other manner of reinforcement built from plans available for purchase or free from the internet or self designed.  There are many, many designers out there which will be another article on it's own.  They are designed to look like real jets, the one on the left above is a Mig-35, the one on the right an F-22.  Although there are some that have the motor mounted on the tail and don't have a hole in the middle, the most popular design is called mid motor mount or "prop in slot" as you can see in this picture.  Although some are designed or can be modified to use an EDF (electric ducted fan), I am a die hard fan of prop driven park jets.
What attracts me to park jets and has given me years of fun and satisfaction is after an initial outlay of cash to get some foam and gear, they are inexpensive to build, fun to fly and can be relatively easily modified to suit your particular flying style.  They are relatively easy to repair or if you destroy one and the components are still good, you can easily recycle them to a new plane.  For me, they are certainly high on the "fun to dollar ratio".  In other words, a lot of fun for very little money spent and I get the satisfaction of flying a plane I have built myself completely from scratch which is a lot of fun and keeps my creativity alive and kicking.

So what are my goals with this blog?  Well, I'm still sorting that out, but here are a few things I hope to accomplish -

  1. Keep it fun, that is why I am in this hobby, otherwise, why bother?!
  2. Keep it educational and informative.  I have learned a lot in five years of flying park jets, much of it through trial and error (heavy on the error...😞), so if I can pass along what works for me in a way that may save you grief or help you along, that gives me a lot of satisfaction.  Also, I was an instructor for most of my Air Force career and I loved teaching, so this blog and increasing the educational content of my YT channel helps me exercise those "muscles" once in awhile😊; 
  3. Keep it honest.  My integrity and credibility are very important to me, so if I discuss a product or how I do a certain thing, it is because it has worked for me for a very long time and I have the utmost confidence in it.  I get no kickbacks/sponsorship or recognition from any of the vendors or companies that sell products I use, so my recommendations are based on good value and solid performance, not any financial gain by me;
  4. Keep it about park jets.  Obviously there will be bits and pieces from other aspects of the hobby enter into discussion, for example I currently am testing a series of quad racing motors for use in park jets, but the primary focus will be about selecting, building and flying park jets; and
  5. Keep it fun! (did I say that already...being on the wrong side of 55 does things to my memory sometimes!)  
Things I will do my best not to make this channel 
  1. Negative and highly opinionated.  Of course I have my opinions and things I like and dislike about certain products or trends in the community, but there is nothing gained by being negative, so that won't happen to the best of my ability.  If it does, I hope readers will call me out on it and I will get myself sorted.  I'll state facts I can back up from research or personal experience, but nothing else;
  2. Too overly technical.  Which is actually pretty easy as I'm not a terribly technical guy.😉  I certainly know a lot of the basic rules of thumb to make my components work well together and my planes fly well, but I am still "drinking from a fire hose" so to speak learning how the "guts" of motors/ESCs/batteries/servos, etc work.  Where possible, I will simply refer to folks who I have learned from and trust and credit them with being the right person to talk to and learn from; and
  3. Boring.  I sometimes do ramble a little bit when I get passionate about a topic, but I will do my best to keep it light, informative and useful to the reader.  I think more video content may also help which is part of my focus.
Well folks, if you are still with me, I once again humbly and thankfully welcome you to my new Park Jet blog.  

Welcome aboard, as fighter pilots would say, "time to kick the tires and light the fires" and get this bad boy going 👍  If you have questions or ideas for articles, please feel free to e-mail me at scott.parkjet@gmail.com.  This e-mail address will be used to deal solely with this blog.

Park Jet noise...the "other" sound of freedom😎

Cheers,

Scott