Thursday, January 18, 2018

Building with Dollar Tree Foam - Part 2 - Minwax lessons learned

Hi Everyone -

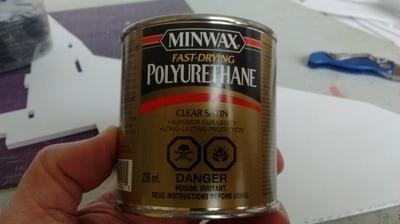
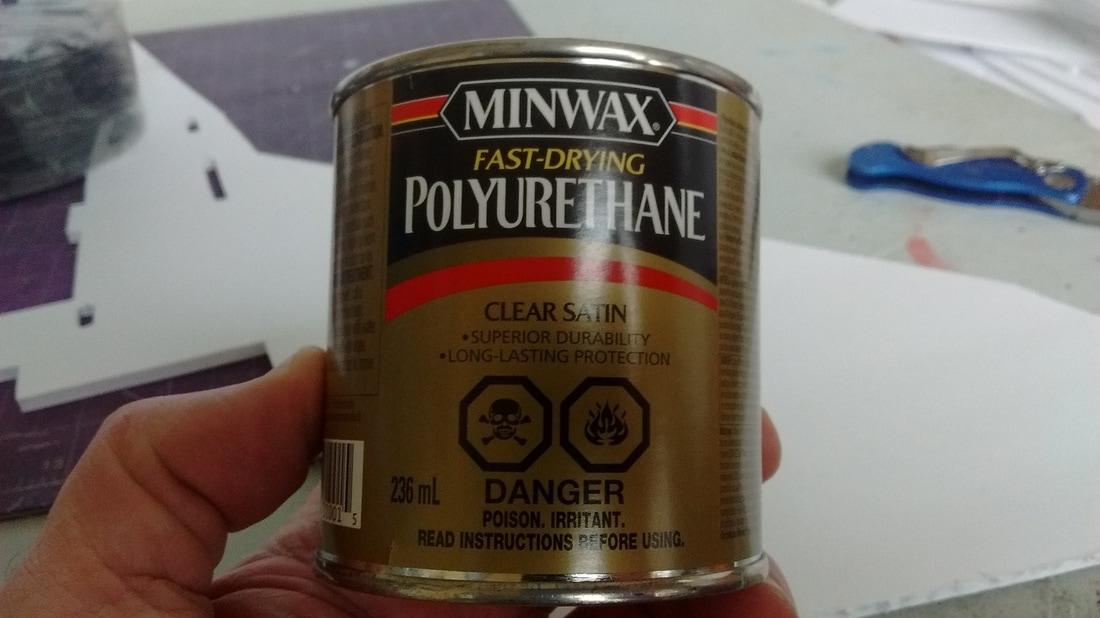
As I mentioned in part 1 of this series of articles, the use of oil-based Minwax polyurethane was a completely new build process for me, so I wanted to do some experimenting before I got the plane together in case there were issues.  I'm glad I did as it helped me select the right product and have the confidence that I was applying the product correctly without adding too much weight or other adverse affects to the foam and structure of my plane.  Here is Flite Test's video on how they recommend using Minwax to waterproof and strengthen DTF.  The timing on how long to leave the Minwax on the paper before wiping it off is not very clear, so that was one thing I wanted to experiment with.

Also, I wanted to see how the Minwax affected the paperless foam and hinge tape as I didn't want the tape to be weakened and have control surfaces come off in flight.  


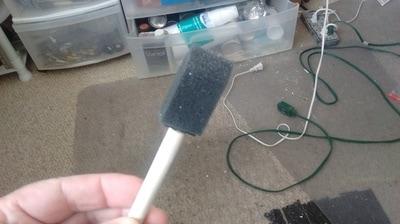
I already had a can of the aerosol oil-based Minwax from another project, however, very quickly I found this not to be suitable.  Even holding the can 12-18" away from the foam, the paper bubbled and wrinkled within about 10 seconds, I assume due to the reaction of the aerosol propellant.  So I needed to use the product in a can and brushed it on with the small foam brushes I get from the Dollar Store.
http://www.migsrus.com/uploads/4/7/4/9/47499877/2017-04-16-09-43-06.jpg
http://www.migsrus.com/uploads/4/7/4/9/47499877/2017-04-01-12-34-12_1.jpg
http://www.migsrus.com/uploads/4/7/4/9/47499877/2017-04-16-09-51-49.jpg
CAUTION:  Minwax has a very strong odor, so I strongly suggest doing this outside or in a very well ventilated area.  Also, after applying the Minwax and then wiping it off the foam, it still gives off a very strong odor as it dries and "off gasses", so I suggest leaving your plane in an area where it won't cause issues in your living space.  I left mine overnight in my garden shed while it dried.  There was still a faint odor left in the morning, but considerably less than before it was dry.

I found the Minwax very easy to spread on scrap foam.  After experimenting, I found that leaving it on the paper for at least 90 seconds to 2 minutes before wiping it off with paper towel saturated the paper sufficiently that after drying water would bead and run right off the surface of the treated paper.  Again, put the paper towel you use to wipe off the Minwax outside in an area where the odor won't cause issue and ensure it is not in contact with too much heat as it is flammable until completely dry.

I also experimented to ensure it didn't melt bare foam, it did not and it added a little strength to the bare foam, but I don't think I would apply it to all the bare DTF just to keep the weight down.

I spread it liberally over some pieces of Scotch brand Tough transparent duct tape that I use for my control surface hinges, left it on for 90 seconds to two minutes and did not notice any wrinkling or bubbling of the tape or adverse affect to the adhesive.  As I accumulate flights on the plane, this will be something I will monitor for durability.

I didn't really notice too much appreciable weight increase on the scrap pieces of foam that I used, so wasn't too worried about that.  It is important to wipe off as much of the Minwax as possible when applying it to the finished plane so that it doesn't accumulate in corners or seams and add unnecessary weight.

Since I applied the Minwax after the air frame was completely assembled and finished, in hindsight I probably should have tested on some scrap to see if the Minwax affected any of the glues that I use, however, everything seems to be just fine.  As mentioned in the video, even after the Minwax has been wiped off and is completely dry, it has a non porous surface that is not conducive to holding any type of adhesive, so all the gluing needs to be done before Minwax is applied or if doing the parts before hand, the areas where glue needs to be applied would need to be carefully protected with tape.  
I think it is easiest to construct the entire plane first, have all the sanding and finishing done and then apply the Minwax before paint, essentially like using the Minwax as a primer on the areas where the paper has been left on the foam.

In the next article, I will discuss the actual build.😊


Park Jet noise...the "other" sound of freedom😎
Cheers,

​Scott

Building with Dollar Tree Foam - Part 1 - Background.

Hi Everyone -

This is the first part of a series of articles I started on the old NAMC blog in the spring of 2017 which I wanted to post here on my new blog with some updates.
In April of 2017, I completed a Mig-35B built entirely from Dollar Tree foam (DTF) or Adams Readiboard.  I have built dozens of planes using paperless DTF for the KF airfoils, but never an entire build, so it was an experiment I had long wanted to try.
Picture
There are several reasons why I wanted to experiment and build an entire score and fold park jet from DTF -
  • with Hobby grade Depron no longer available in North America, I wanted to explore another option other than Model Plane Foam (MPF);
  • one of the NAMC Su-27 Flanker beta test pilots Peter (homey666 on the RC Powers forum) built an Su-27 with it and I was very impressed with not only how it looked, but how it flew; and
  • it is always fun to experiment with new building materials as it makes me a better builder overall.
I had a few goals going into the build -
  • I wanted the plane of course to look good which gave me a chance to experiment with sanding, finishing and painting a complete DTF build;
  • The plane needed to be strong in order to hold up to my flying style, so I needed a nice strong wing and control surfaces without weighing the plane down.  My goal was to end  up in the 21-22 oz 595-624 gr range with a 2200 3S battery which is my "sweet spot" for planes for planes with most power setups I like to use; and
  • since even in the summer time, I am often landing on wet grass, the plane needed to be waterproof and durable, again without it being too heavy.
Preparation

Peter had already shared some great build tips on the NAMC Su-27 Flanker design, build and test thread and I already had a few ideas from watching Flite Test build videos, however I wasn't exactly sure how I would be able to accomplish my goals listed above.  Fortunately, Peter graciously agreed to help me out, I found a set of Mig-35B plans tucked away in my closet and away we went.

I have a Dollar Tree store in another town about a half hour drive from me, so access to DTF is quite easy.  I procured a few extra sheets to add to my supply and was ready to start cutting foam.  Other supplies I already had and from testing I knew that all the glues I already use with Depron and MPF would work just fine with DTF.  I did need however to get some oil based Minwax to help in the water proofing and strengthening of those areas of the plane where I would be leaving the paper on the DTF.  
Picture
I also found and watched this video from Flite Test (please click on the link, the video is unlisted and I couldn't get it to upload from YT😒)to educate myself on how to use the Minwax to best protect my plane without harming the foam or adding excessive weight.

I cut out the parts for the Mig-35B and after carefully laying them out, determined I would need four (4) sheets of DTF to build this plane including the KF4 airfoils.  I will cover this in more detail in Part 3 of this series.

Cost analysis

Of course we are all probably looking for ways to build our planes better and cheaper, so how would this build compare to my other builds from a standpoint of foam costs?  Unfortunately, because I had to spend about $7 USD on a can of Minwax, it skews the results, but I'm sure I'll find something to use the Minwax for, perhaps another DTF build or two 😊

I still have several sheets of Depron I am hoarding, Depron costs me about $9 USD per sheet by the time it is shipped to my door.  MPF, I actually use Fli-Power Value XPS from RC Foam costs me about $5 USD per sheet shipped to my door.  The DTF costs me $1.25 Cdn or $1.00 USD based on today's exchange rate per sheet and I can buy it locally.

When building with Depron, I use MPF for the fuselage and canopy to save Depron and money.  These builds require -
  • one full sheet of Depron - $9;
  • 1/4 sheet of MPF - $1.25; and
  • one sheet of DTF (for KF airfoils) - $1.00.
  • Total - $11.25
When building entirely with MPF, my planes use about 1 and 1/4 sheets of MPF.

These builds require -
  • one and 1/4 sheets of MPF - $6.25; and
  • one sheet of DTF (for KF airfoils) - $1.00.
  • Total - $7.25
Foam cost for building this Mig-35B entirely of DTF - $4.00.

With both MPF and the DTF I do need more reinforcement than with the Depron build, but I recycle sections of carbon fiber tube or use bamboo BBQ skewers I get from the Dollar Store which cost me about $0.01 Cdn each.

The DTF build did require a bit more glue to seal the edges of where the paper was left on, maybe 1/4 bottle of the Craft Medley glue I now use (a Foam Cure equivalent).  This glue costs me $1.00 USD and I can get it at my local Dollar Tree, so lets round up the DTF build cost to $4.10 not including the Minwax.

​So if I built a lot with DTF, it would be a very cost effective way to build financially and I can always get more foam locally without needing it shipped to me.

Before getting further into the build process, the next part of this series of articles will discuss my experimentation with Minwax.  As the use of Minwax was an entirely new building process for me, I wanted to do some experimenting before applying it to a completely built plane in case there were issues, so the next article will cover Minwax lessons learned.

Park Jet noise...the "other" sound of freedom😎
Cheers,

​Scott

Wednesday, January 17, 2018

Quad racing motors in park jets, Part 2 - starting to make sense of it all

Hi Everyone -

I will warn you ahead of time, this is a bit of a long post, especially if you watch both the videos from start to finish (if I had one to recommend, watch the second video by Kabab FPV first).  You might want to grab a beverage (preferably caffeinated😉) and maybe a snack or two before you get settled in.😋

It has been almost ten months since I first started experimenting with using a quad racing motor in a single motor, prop in slot configuration in a foam park jet.  This little beauty right here😊
Including this first RC Timer FR2205 2550 Kv motor, I have now flight tested eight different quad racing motors in various sizes and Kv ratings.  I still have four more on the way to test and evaluate that were selected based on what I have learned to this point.

During this time, I have spent lots of time researching motors, watching videos, including many of rcplanepirate's from whom I have learned a lot.  Not only have I learned a lot about quad racing motors, but brushless outrunners in general, so it has been and continues to be a very interesting and educational journey.

I also found Ryan Harrell's website www.miniquadtestbench.com (I wish I had found this a bit earlier) from which I have learned a lot also.  I do find his charts a bit tough for me to interpret, but his writeups on each motor he has tested have been very helpful to understand what might be a good motor or good value for the dollar.

I found his website after watching this video interview between Ryan and Joshua Bardwell who is one of the leading guys on YT when it comes to the technical aspects of quadcopters and all their components.  I admit that I have watched this video several times to try and understand what they are talking about.  A lot of it is still a bit technical for me, but I have still learned a lot from their interaction and Ryan's experience as being one of the leading (if not the leading) tester of quad racing motors and ESCs.

Another video I have watched a few times and found easier to understand is this one from a fellow called Kabab FPV on YouTube.  I found this one a little easier for me to follow as he has several motors apart so it is easier for me to visualize and understand several important aspects of what makes one motor better or different than another.
So I would like to tell you that I have determined exactly the best make, size, Kv quad motor for use in a park jet.  Though some numbers are starting to take shape, like many things in life, there are often exceptions to rules we try to make😕

Maybe now is the time to back up a little bit.  When I first started down this path, one of the main things I wanted to find was a motor that would give me fairly close performance to what I call the "park jet workhorse" the 2212/6 2200 Kv motor, but looking to reduce the motor weight considerably.  You can watch this video to learn more about my thoughts on this most popular of park jet motors.

I was also putting some challenges in front of myself as I would be running these quad racing motors on 3S when most of them are designed to provide optimal power on 4S and sometimes higher.  I would also be spinning more conventional 6" two or three blade props as opposed to 5" quad racing style props.  Although I knew that I probably wouldn't find anything as efficient (low amp draw for equivalent power) among the quad racing motors when compared to the 2212 2200 motor, as long as I didn't have to use anything more than a 40A ESC, I was OK with that.  

As the testing went along and I watched more of RCPP's videos, I also decided that the 6x4 APC gas prop would be my standardized prop for all motor comparison.  Although I will bench and field test all the motors eventually with other props, the 6x4 APC gas prop is now my favorite overall park jet prop for reasons I explain in this video.

It is important to add that the planes I like to fly and the style in which I fly them might demand a much different power setup and performance than others might seek.  I wrote this article which is Quad racing motors in park jets, Part 1 that discusses what I think is important in selecting and building to optimize quad motors for how I like to fly.

If you watch my videos, I don't spend a lot of time flying around slow, I have a pretty heavy throttle thumb and like to have some good punch out power for acceleration and vertical maneuvers.  I also like a motor that when I'm cruising around at about 60% throttle, I can do basic turns, rolls and other simple aerobatics without having to mess too much with the throttle.  I guess I don't ask for too much, do I?!😉

So while I think all the quad motors I have tested have at least equal power in top end speed (perhaps not equal torque) to the 2212 2200 Kv motor, they are certainly lighter, but all are more amp hungry.  Like many things in life, trade offs are required.

Awhile back, a viewer posed a question on one of my field test videos asking me to rank my favorite motors based on thrust, weight and price.  Since then, I have reviewed my notes, watched my videos several times and come up with what is currently my favorites for how I like to fly.  As I have mentioned, I am basing this currently all on field performance as until I have my thrust stand, my thrust test numbers are fairly suspect.  I didn't worry too much about price, I think you get what you pay for and sometimes if you want the ideal power setup, you just have to pay a little extra for it.

I have broken it down into two lists, one with motors of 2700 or higher Kv, the other with motors under 2700 Kv as the difference is noticeable at this Kv point, primarily based on top end speed, not so much torque or other factors.  

I took this picture of the 2700 or higher Kv motors (links to each below the picture).  Prices shown in USD, weight is with all hardware and prop (i.e. ready to go in the plane), amps pulled is full throttle with 6x4 APC gas prop on 2200 3S 40C battery.
 Motors under 2700 Kv.  These motors all produce less top end speed than the 2700 or higher Kv motors, but the first three all produce pretty good torque, equal to (or in one case greater than) the 2700 or higher Kv motors.
So despite putting rankings on them, all of these motors are good, I have not been disappointed in any of them, in fact I was pleasantly surprised with a few of them, especially the two Racerstar motors.  Again, it boils down to what you can get, what you can afford and what works best for you like much to do with this hobby.

Because of how I like to fly, I would probably be in favor of the 2700 or higher Kv motors over the less than 2700 Kv motors, but they would all play their roles depending on the size, weight and performance I was looking for out of a particular plane.

So what criteria did I use for my rankings?

The EMAX 2750 seems to be just that little bit better in torque, top end speed, motor quality and smoothness than any other motor I have tested thus far.  It is also rated as being able to handle 58A, so given the low amount of amps I'm putting through it, I think it should last a pretty long time.  I know it will be difficult for you to see, but based on some of the criteria from Kabab FPV's video above, the EMAX motor has curved N52 magnets, tight air gaps, tight tolerance between the magnets and stator and multi strand windings around the stator arms (supposedly produces more power).  The motor spins smooth, the magnets are strong and "grabby", but not bumpy.  According to the evaluation on www.miniquadtestbench.com, this motor is actually a 2630 Kv motor.
I gave the BeeRotor 2207 2780 and BrotherHobby 2205 2800 motors pretty much equal billing.  I would say they are close to equal at top end, the BH motor is obviously quite a bit lighter, but the BeeRotor motor does have slightly more torque.  This is due to a slightly taller stator, but also larger magnets.  I can't find out if the magnets are N52 (perhaps N50), but they are about 50% thicker than those on the EMAX and BH motors.  There is a bit more air gap between the magnets and the tolerance between stator and magnets is not as tight as that of the EMAX and BH motors.  The magnets are strong and "grabby", but it does run a bit "bumpier", again it has multi strand thin wires wrapped around the stator.  A very strong overall performer.  According to it's writeup on www.miniquadtestbench.com, this motor is evaluated as a 2630 Kv motor as well.
The BrotherHobby motor is about equal in top speed to the BeeRotor and I give it such a high rating because it definitely punches above it's size and weight and at 40 gr is the lightest motor I have tested thus far.  What it lacks in torque is made up somewhat by high Kv.  The magnets are curved with tight air gaps and tight tolerance between the stator and magnets.  It has slightly thicker wire on the stator windings, draws a few more amps and might be capable of higher temps than the previous two motors.  Again, it is unbelievably powerful for it's size and weight.  In a small, light wing or park jet on a calm day it would be tough to beat this little beast😏
The Racerstar BR2306S 2700 Kv is a real surprise and the best value in the 2700 or higher category.  Slightly less torque and top end speed than the two motors in second place, but for the price it is very tough to beat.  Considering it only draws 29A, it could probably be run on a good quality, lighter 30A ESC where the other three would all need to be run with a 40A ESC, so an additional potential weight saving of about 8 gr with a 30A ESC.  The magnets are flat and don't feel super strong compared to the other motors, but the air gaps are pretty decent and the tolerance between the stator and magnets is pretty good considering it's price.  Again, it appears to have thinner multi strand wires wrapped around the stator arms like the EMAX and BeeRotor motors.  A very pleasant surprise in "power for dollar" ratio.😊
For the motors that are less than 2600 Kv, they all have lower top end than the previous four motors.  Normally, if I have a motor that I know is not going to give me blinding top end speed, I opt in favor of best torque so I can fly slower and then be able to hammer through lots of aerobatics confident I can "muscle" myself out of trouble if need be.

The Racerstar BR2406S 2600 Kv motor has probably the most torque of all the motors I tested including those at 2700 Kv or higher.  This would be my choice if I wanted brute force torque for a particular plane or flight envelope.  It has flat magnets, they look about the same size and thickness as those on the Racerstar 2306 2700 with slight more air gap between them (expected I suppose with the slightly larger bell).  Although I didn't measure, I suspect the stator arms are longer, the windings are multistrand and thin, the motor runs smooth and not bumpy, so the magnets are not as strong as some other motors.
The Multistar Viking 2208 2600 Kv motor has the edge in top end speed of all this group of motors, not quite as much torque as the Racerstar 2406, but better than both the RC Timer motors in this group.  It is very hard for me to get a picture of the bottom of this motor without taking it apart, so I borrowed this one from the Hobby King website.  It has fairly thin but curved N50 grade magnets, the wires wrapped around the stator arms are thin and multistrand.  The magnets do feel strong and "grabby" with fairly small air gaps between them.  I would compare it closer to the DYS BE2208/7 2600 Kv motor I have run for quite awhile, but lighter (by 4 gr), slightly better made and more powerful.
The two RC Timer motors in this second group are quite similar in top end speed even though the 2306 size has 100 more Kv, the 2306 motor does have noticeably more torque, but you pay a bit of a weight penalty as it weighs 8 more grams than the 2205 2550 Kv.

As you can see in these pictures below (2306 2650 Kv first, 2205 2550 Kv second), there is a pretty noticeable air gap between the magnets and not a terribly tight tolerance between the magnets and stator compared to other motors I have tested.


In all honesty, if I had to choose between these two RC Timer motors, I would probably go with the less powerful 2205 2550 Kv motor primarily because it is lighter, more efficient and can use a wider variety of props.  I have used this motor the most and have much more flight time with it than any other quad motor thus far, I did a more in depth discussion of my experiences with it in this video.

As mentioned before, there are certainly exceptions to making any rules.  The BeeRotor 2207 2780 and the BrotherHobby Returner R2 2205 2800 (definitely makes up for small size with increased Kv) would be exceptions perhaps as I think for most other brand names, going with a 2305/06 or 2405/06 would be my choice in 2700 or greater Kv motors to ensure that in addition to top end speed there is still good torque.  

In the lower Kv, I don't think I would ever choose a motor below 2600 Kv on 3S anyway, I think 2406 is probably the ideal stator size for what I want to achieve with my planes. 

So of course these are my opinions based on what I like to see out of my planes.  Quad racing motors are a bit of a "double edged sword" when trying to track down what will work the best in a park jet on 3S as the variety of sizes/Kvs/brands is quite staggering.  From what I have seen, EMAX, BrotherHobby, BeeRotor and Multistar brands have certainly done a good job of squeezing the maximum amount of power from their motors.  For best value, it is tough to beat the two Racerstar motors, however.  Their quality control might be a bit of a risk perhaps compared to the other higher quality brands, but tough to beat the "power for price" ratio.

So still more motors to evaluate and much more to learn.  My biggest challenge is knowing when to stop evaluating motors before I "go broke saving money" on motor sales!😟 

Park Jet noise...the "other" sound of freedom😎

Cheers,

Scott


Tuesday, January 16, 2018

Foxeer DATURA X2206 2700 Kv quad racing motor initial impressions

Hi Everyone -

Another quad racing motor arrived in the mail today, the Foxeer DATURA X2206 2700 Kv I picked up from Banggood on sale for $18.90 USD (regular price $22.63)
Mine came with mounting bolts to attach it to a quad copter and one prop nut.  Note that the shaft is hollow to keep the motor as light as possible.


My scale kept fluctuating between 30 and 32 gr, so I'll call it 31 gr/1.1 oz with no hardware attached.

It has slightly curved magnets just like the EMAX RS2306 2750 Kv motor, in fact they look about the same size and they are N52 magnets just like the EMAX motor.  The tolerance between the magnets and stator is very tight.  The motor spins smoothly by hand, but you can feel that the magnets are strong and "grabby"😉  Also of note, the shaft can be changed by removing a nut rather than messing with a "C" clip.  The EMAX motor came with a spare bolt and washer for this, this motor did not, but I don't consider that too critical.
The motor wires are about 5"/130 mm long, I will leave them this length.
With bullet connectors, heat shrink, prop and prop nut attached, motor weight is now 42 gr/1.5 oz.
This puts this motor close to the same category for lightness as the BrotherHobby Returner R2 2205 2800 Kv, so I'm excited to see the comparison since the DATURA has a slightly taller stator, but is rated at 100 Kv less.  From the looks and feel of the motor out of the box, I am hoping for some good things.  I will get bench testing done when my thrust stand arrives in the mail, this motor may get field tested before it gets bench tested, but that's OK😉

I can't really seem to find a max amp limit for this motor.  In one of the charts it showed it pulling 46.23A at a temp of 62C.  I don't think I will ever be pulling that many amps on 3S, I will give it a quick check with the wattmeter before flying if I haven't bench tested before then.

Edit/update 08 Mar 2018:  Ryan Harrell from miniquadbenchtest.com just released this report on the Foxeer DATURA X2206 2700 Kv.  He found it is actually a 2620 Kv motor, but the rest of the report looks quite good😊

Park Jet noise...the "other" sound of freedom😎

Cheers,

Scott


RC Powers T-50 V5 build log - Part 6...finally finished :)

Hi Everyone -

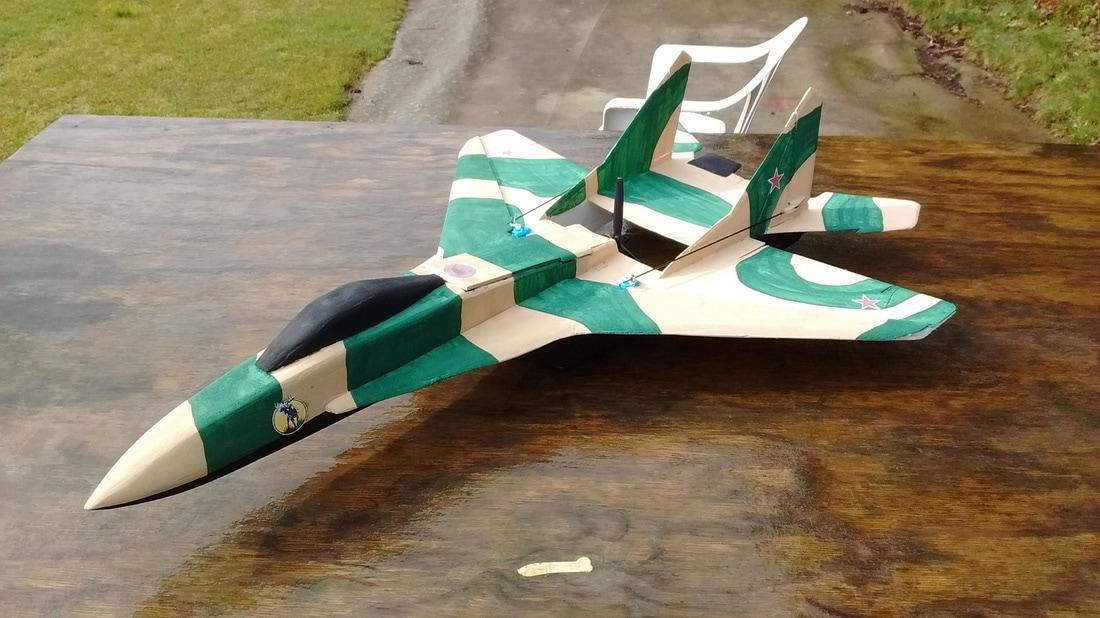
One modified RC Powers T-50 V5 ready to "slip the surly bonds of earth"😊


I may have mentioned in a previous post that I was thinking of doing the black, white and grey Arctic camo scheme like I have on my test bed Mig-35B, but I decided to go with a "blue" theme this time for something different.  I think it turned out OK, either I thinned the paint too much or the Minwax treatment on the DTF where the paper is didn't allow for terribly good paint coverage.  No matter, I could put another coat of paint on, but that would add weight.  I'm more worried about how it looks at 200 ft away (to help my poor old 56 yr old eyeglass assisted MK 1 eyeballs keep track of it😒) than how it looks at 2 ft away😉

My AUW with 2200 3S battery is pretty good, 552 gr/19.5 oz, so I think it should be pretty light and quick.  I decided to put the EMAX RS2306 2750 Kv motor in this plane as it is billed as being pretty fast according to RC Powers, so I might as well give it the motor it deserves😉.  I will run a 6x4 APC prop and 40A ESC.

I mounted my rudder servos in the back first so that I could then run the rudder servo wire outside the prop slot and then back in through the hole where the elevon servo is mounted.  This will ensure no possible interference with the prop by the rudder servo wires.
As I discussed in my servo video, the wires on the 5 gr servos aren't very long, so since I use a "Y" harness to connect my servos to the receiver, I ran the two Y leads out from the electronics bay so that I could connect the rudder servos, then tacked everything down with a bit of hot glue, including making sure the rudder servo leads were secure in the Y harness plugs.
I decided to trim a bit off the rudders themselves as when it was sitting on the table, these were completely flat on the surface, so by putting a slight angle on them, hopefully this won't cause such an abrupt landing as I flare it in.  I probably trimmed about 1/4" off the back and then angled it down to the rudder hinge line.
For durability, I always spread a very thin layer of glue (this glue which is identical to BSI Foam Cure) on the nacelles and along the bottom of the nose.  It dries light, clear and hard like epoxy, but doesn't turn yellow over time like epoxy does.  Fortunately, I can get this at a local dollar store and it is much cheaper than Foam Cure.
A bit hard to see the glue in this picture, but where it is shiny shows the glue.  I darkened this with black magic marker first to help with orientation.
I put a thin layer on the bottom of the nose forward of the small air vent.  Since the T-50 doesn't have a lot of nose clearance off the ground (especially since I lowered the nacelles by 7 mm), I suspect occassionally on landing it may tilt forward as it comes to a stop.  This glue will help the foam from getting gouged and torn.
Although I won't know how the build and my modifications turned out until I get a chance to fly it, I'm quite pleased with how it looks and with my final flying weight, I think with the fairly low profile it will be a pretty speedy little beast.  More to come as I get it in the air and start putting it through it's paces.😊

Park Jet noise...the "other" sound of freedom😎

Cheers,

Scott